Blurry photos are one of the most frustrating problems in photography. A great moment, a perfect composition — ruined by motion blur, an out-of-focus lens, or a low-resolution source. The good news is that AI can now fix blurry images with remarkable accuracy. If you want to enhance image quality online free without downloading software or creating an account, this guide shows you exactly how — and what kind of results you can realistically expect.
Why Photos Come Out Blurry
Understanding the cause of blur helps set the right expectations for how much AI can fix it:
| Type of Blur | Cause | How Well AI Fixes It |
| Soft focus / slight blur | Missed focus point, shallow depth of field | Excellent — AI restores sharpness naturally |
| Motion blur | Camera shake or moving subject | Good — works on mild motion blur |
| Low resolution blur | Image too small, stretched to fit larger display | Excellent — 4x upscale with detail reconstruction |
| Compression blur | Repeated saving, social media download quality loss | Very good — AI recovers compressed detail |
| Age / scan blur | Old photo, scanner limitations | Very good — AI reconstructs missing detail |
| Severe motion blur | Fast movement, very long exposure | Limited — extreme blur can’t be fully reversed |
How AI Sharpening Differs from Traditional Tools
Most photo editors have a sharpening tool — it’s usually a slider that increases edge contrast. The result is a photo that looks artificially crisp but hasn’t gained any real detail. Increase it too much and you get a halo effect around edges that’s immediately obvious.
AI sharpening works on a fundamentally different level. The model has learned what sharp, detailed images look like — skin texture, hair strands, fabric weave, architectural lines — and uses that knowledge to reconstruct the detail that was lost or missing. The result isn’t artificially sharpened; it’s a genuine reconstruction of what the image should look like.
Step-by-Step: Sharpen a Blurry Photo Online
Step 1: Open Phototune.ai in your browser. The AI image enhancer works directly in the browser on desktop or mobile — nothing to download, no account to create.
Step 2: Upload your blurry photo. Drag and drop, or click to browse. JPG, PNG, WEBP, and AVIF are supported up to 10MB.
Step 3: Choose your upscale setting. For a photo that’s the right size but just blurry, 2x is a good starting point. For a small or low-resolution image that needs to be larger AND sharper, choose 4x.
Step 4: The AI processes the image — sharpening, noise reduction, and detail reconstruction happen automatically in one step. Results are ready in seconds.
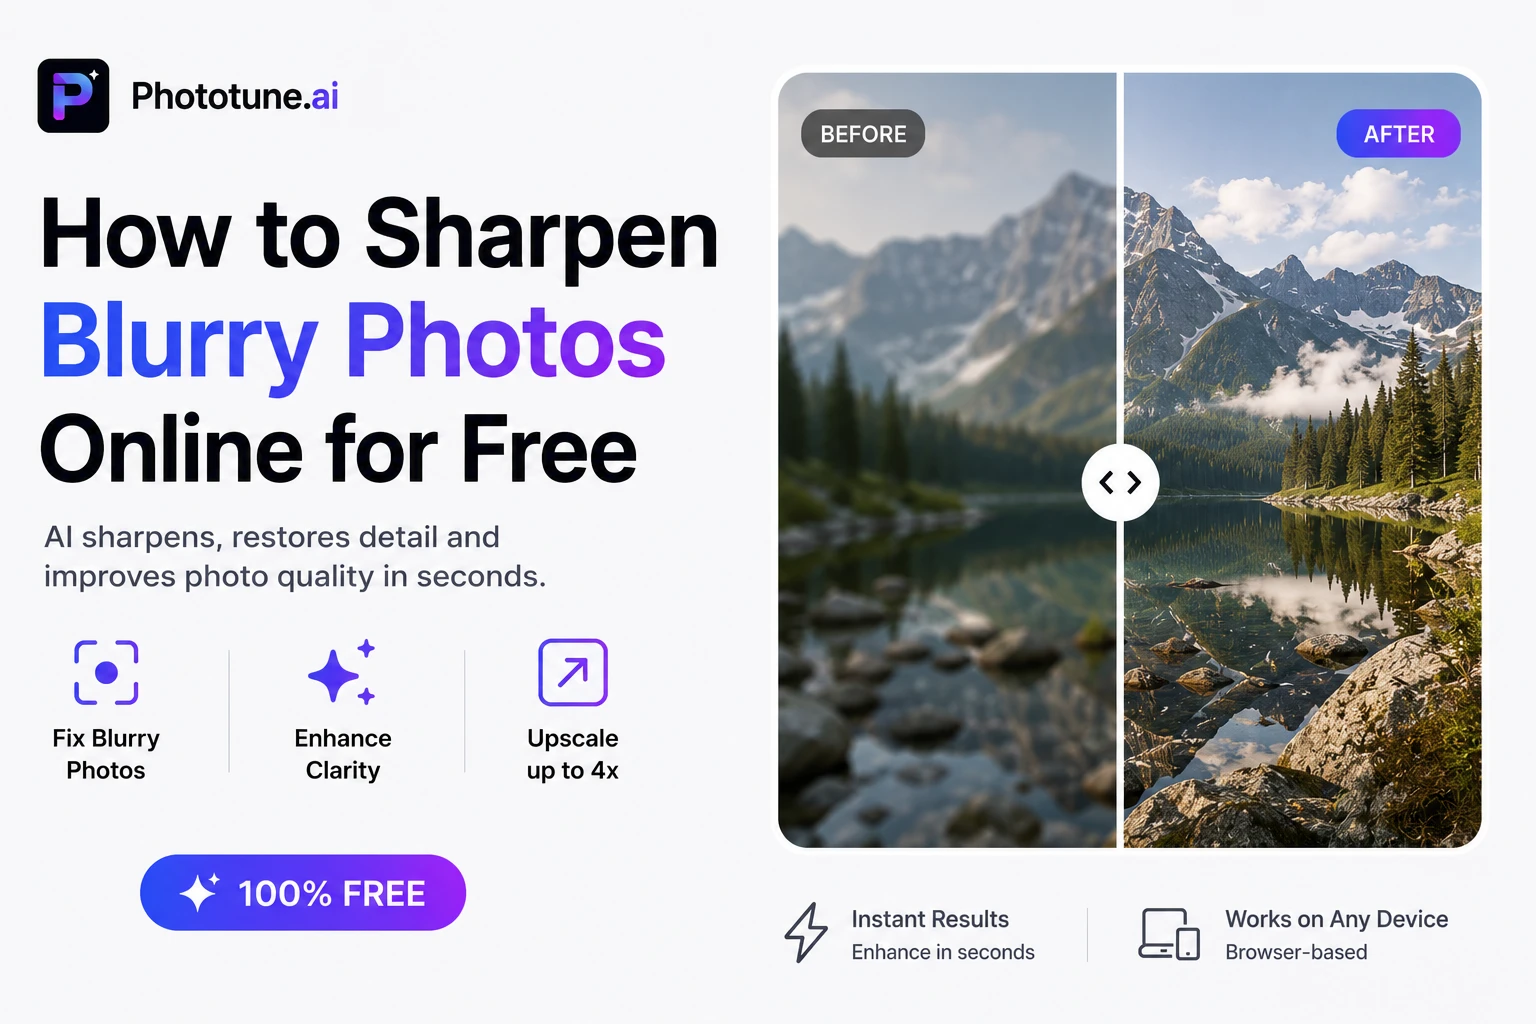
Step 5: Use the before/after comparison to check the result. Pay attention to fine detail areas — hair, edges, text, fabric — where the improvement is most visible. Download when satisfied.
Realistic Expectations: What AI Can and Can’t Fix
AI image enhancement has improved dramatically, but it’s not magic. Here’s an honest look at what to expect:
- Slightly out of focus portraits — excellent results. AI reconstructs skin and hair detail that was soft but present.
- Low-resolution images stretched to fit — excellent results. 4x upscaling with AI reconstruction turns pixelated images into sharp, detailed ones.
- Old family photos from scans — very good results. Missing detail is intelligently reconstructed.
- Social media compressed images — very good results. Compression artifacts are reduced and fine detail is recovered.
- Severely motion-blurred images — limited results. Extreme blur from fast movement is difficult even for AI to reverse convincingly. Mild motion blur can be improved.
Best Use Cases for AI Photo Sharpening
| Use Case | Why It Matters |
| E-commerce product photos | Sharp, detailed product images increase trust and conversion rates |
| Portrait photography | Clients expect sharp, professional results — AI fixes minor focus issues |
| Printing old family photos | Low-res scans need upscaling and sharpening for large-format prints |
| Social media content | Compressed or downscaled images look unprofessional — AI recovers quality |
| Real estate photography | Sharp images of rooms and exteriors make listings more appealing |
| Document and screenshot clarity | Text and interface elements need to be readable at any size |
Tips for the Best Results
Start with the highest resolution version you have. Even if the photo is blurry, more pixels give the AI more information to work with. A 2000px blurry photo will produce better results than a 400px blurry photo.
Use 4x for printing. If you’re preparing an image for print — especially at A4 or larger — always choose 4x upscaling. The additional pixel density keeps the image sharp at high DPI.
Compare in full zoom. After downloading, view the image at 100% zoom to properly assess the quality. At reduced zoom, differences are harder to see — the real quality check is at full resolution.
Try Phototune.ai’s free tool to sharpen photo online free — upload your blurry image, select 2x or 4x upscaling, and the AI sharpens and reconstructs detail automatically. No account, no software, results in seconds.


