Workplace Wellness Wall Art for Mindful Work Rooms | Artesty

Daily writing prompt
Write about a few of your favorite family traditions.

Introduction: a calmer workday can start on the wall

Work rooms are full of small cues that shape how people feel: the glow of a monitor, the pace of meetings, the layout of the furniture, and the look of the walls. When the visual environment feels steady, it becomes easier to reset between tasks, stay present in conversations, and finish the day with less mental noise. Mindfulness wall art can support that goal in a simple, practical way. A well-chosen canvas print or art print becomes a quiet reference point—a place for your eyes to rest for a few seconds before you return to the next task.

This guide shows how to choose wall art, canvas art, and wall decor for workplace wellness across offices, home offices, studios, and shared team rooms. You’ll learn what “mindful” design looks like, which themes tend to work well in work settings, how to pick size and format, and where to place pieces so they support focus instead of competing with it.

What mindful design means in a workplace

Mindful design reduces visual friction. In a work room, that often means fewer competing focal points, more breathing room on the wall, and decor choices that help attention stay steady. Instead of filling every surface, mindful spaces use one or two clear anchors and keep the rest calm and functional. Wall art helps because it sets the tone of the room at a glance. When the wall print feels ordered and calm, the room can feel easier to return to—especially during busy stretches.

In shared rooms, mindful artwork can help people settle into a meeting. In personal work zones, a single large wall art piece can support deep work in the morning and a slower pace later in the day. The goal is not to “decorate more,” but to choose pieces that work with the room’s purpose.

How wall art can support daily focus

A visual pause between tasks

Most workdays involve constant switching: tabs, notifications, chat messages, and quick questions. A canvas print placed in your natural line of sight can become a short “pause point” for your eyes. That tiny break—just a few seconds—can help you return to the next task with a steadier head and fewer distractions.

Less screen fatigue

Work rooms that rely on only screens and blank walls can feel sharp after long hours. Paintings, canvas art, and art prints add texture and warmth without adding clutter. For focus-first rooms, choose artwork with clear shapes and controlled detail so your attention stays where you want it. If you share a space with others, a calm piece can also make the room feel less tense during high-pressure days.

A steadier tone for meetings

Meeting rooms need a background that feels welcoming without being loud. One well-placed wall hanging on the main wall can soften the space and help conversations start on an easier note. This is especially helpful for rooms used for interviews, reviews, coaching sessions, and team check-ins—moments when the room’s feel matters.

Theme ideas for mindfulness-friendly wall decor

Start by matching the theme to the purpose of the room. A focus-first space often works best with clean lines and open space. A recovery space—like a lounge—can handle softer forms and gentle scenes. If you’re choosing for a shared work room, aim for themes that feel neutral and welcoming so the piece works well for many people.

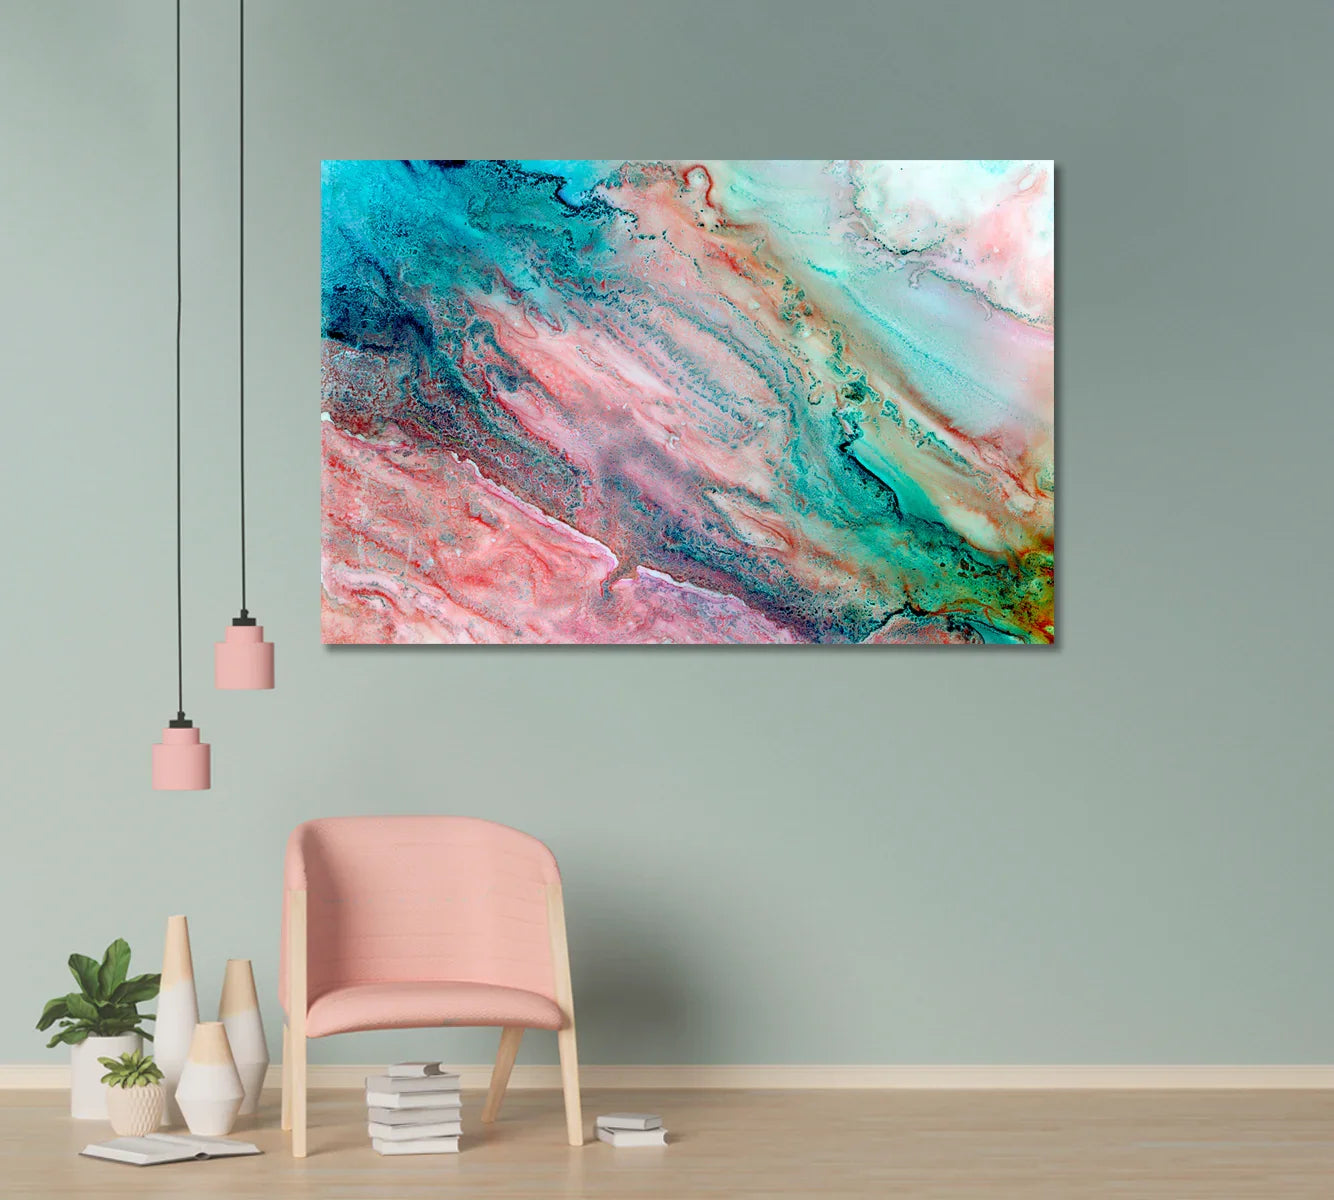
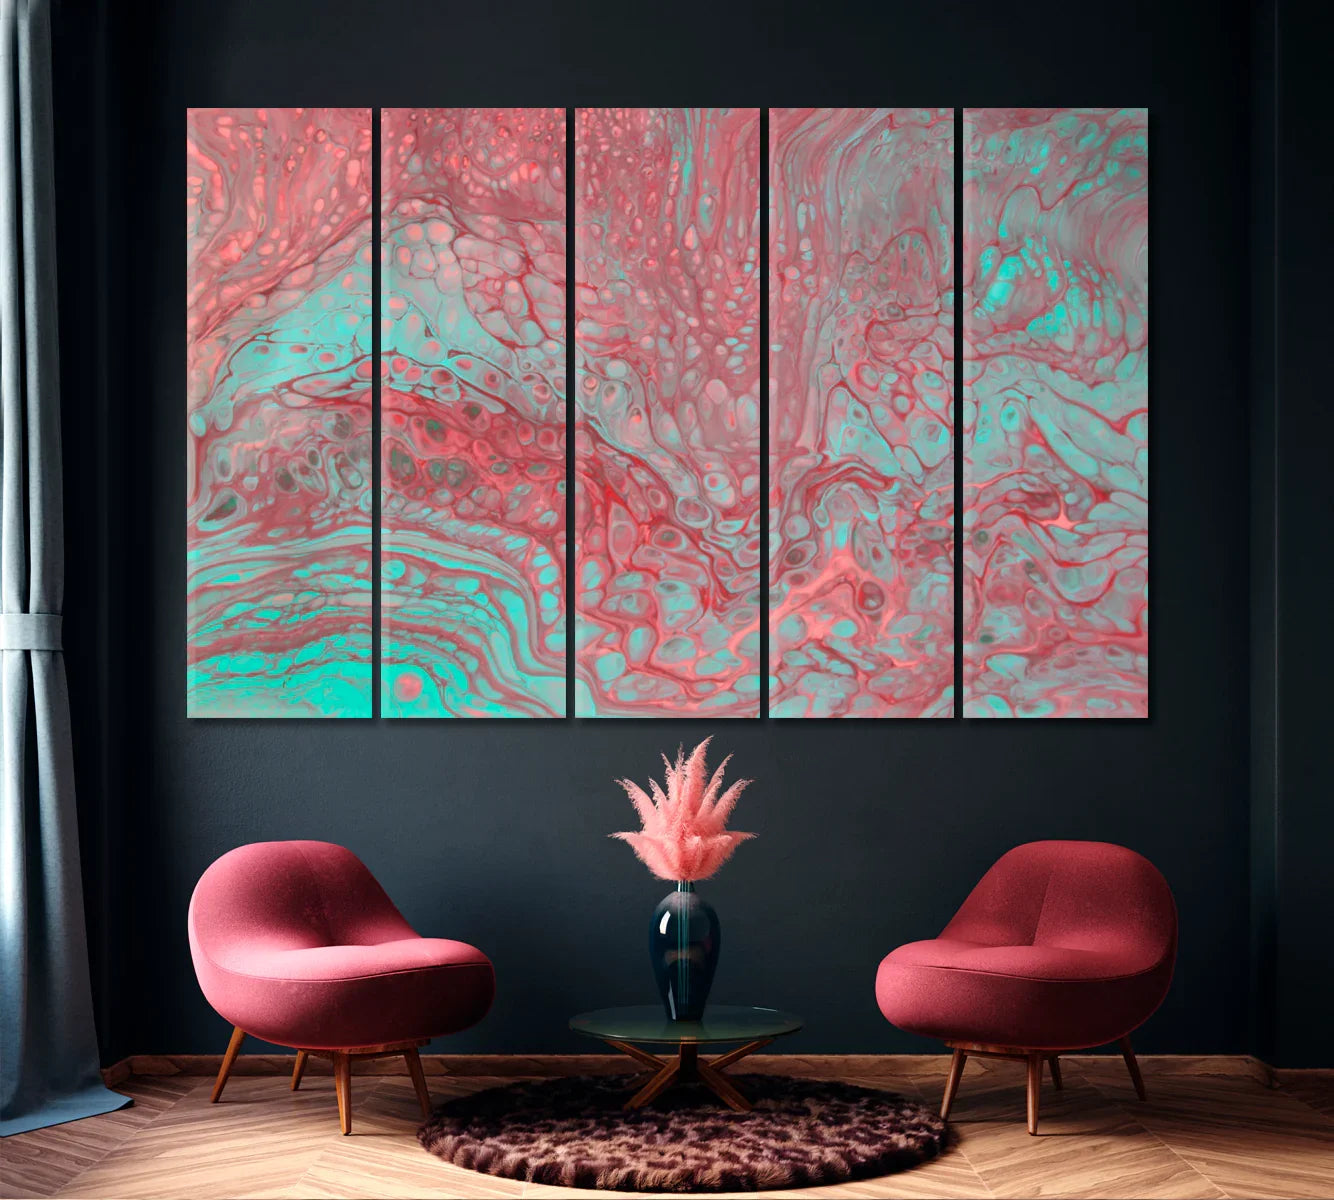
  • Nature canvas prints: skies, water, forests, stone, and calm landscapes can support a slower rhythm.
  • Minimalist artwork: simple shapes, clean layouts, and plenty of open wall help keep attention steady.
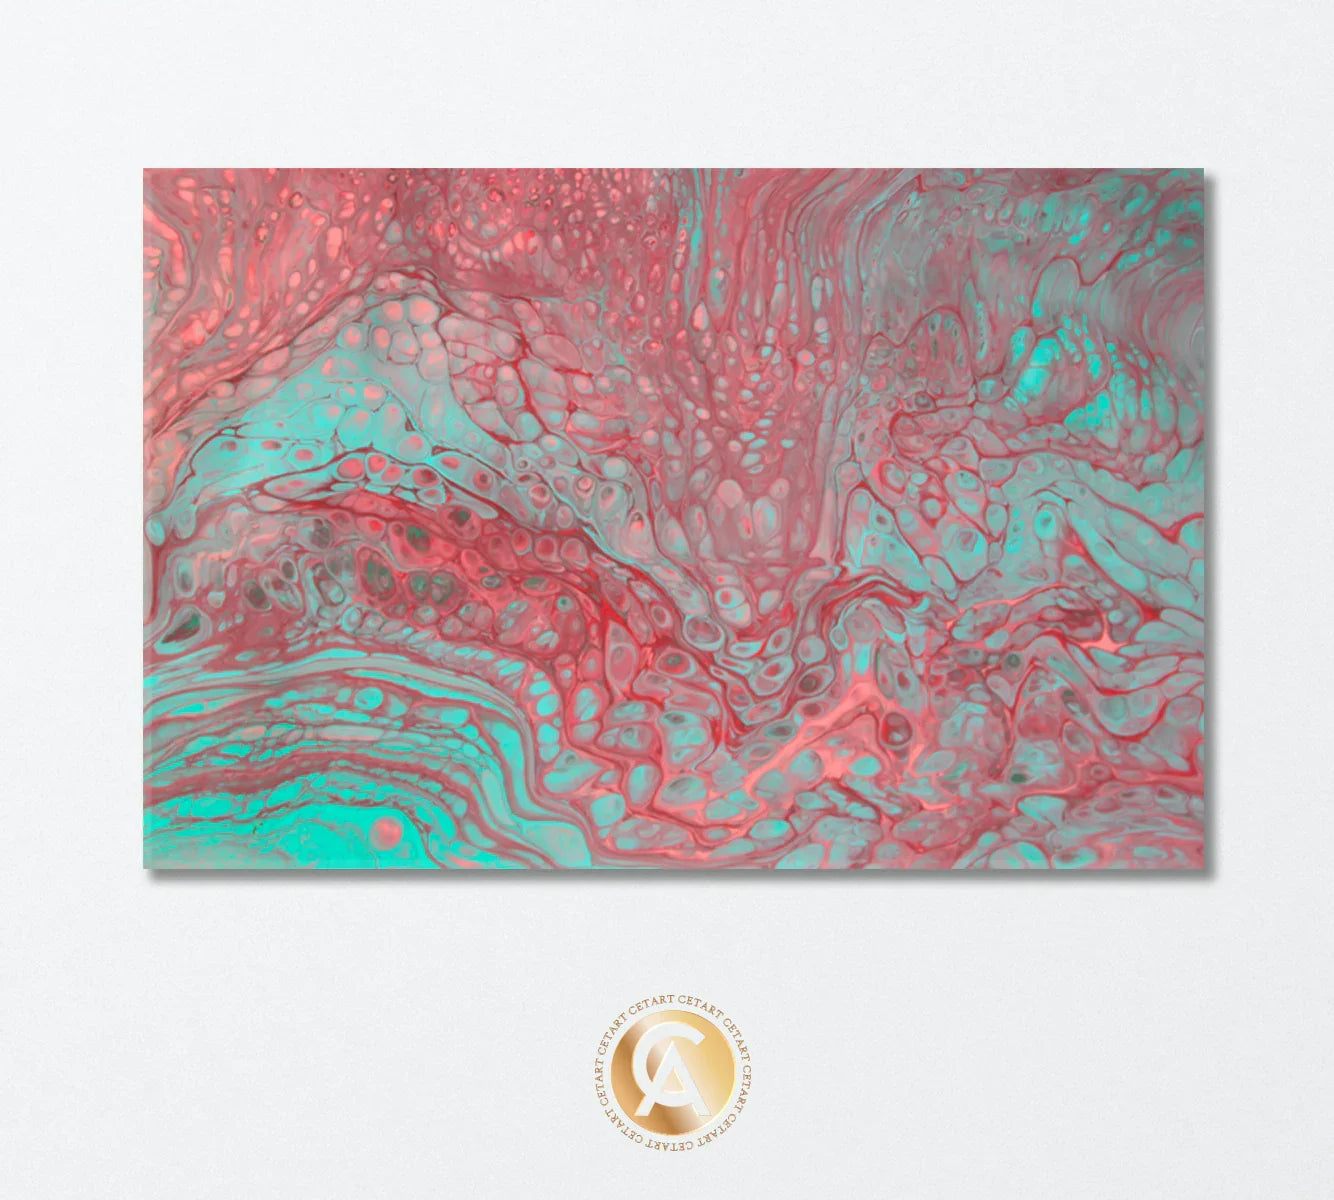
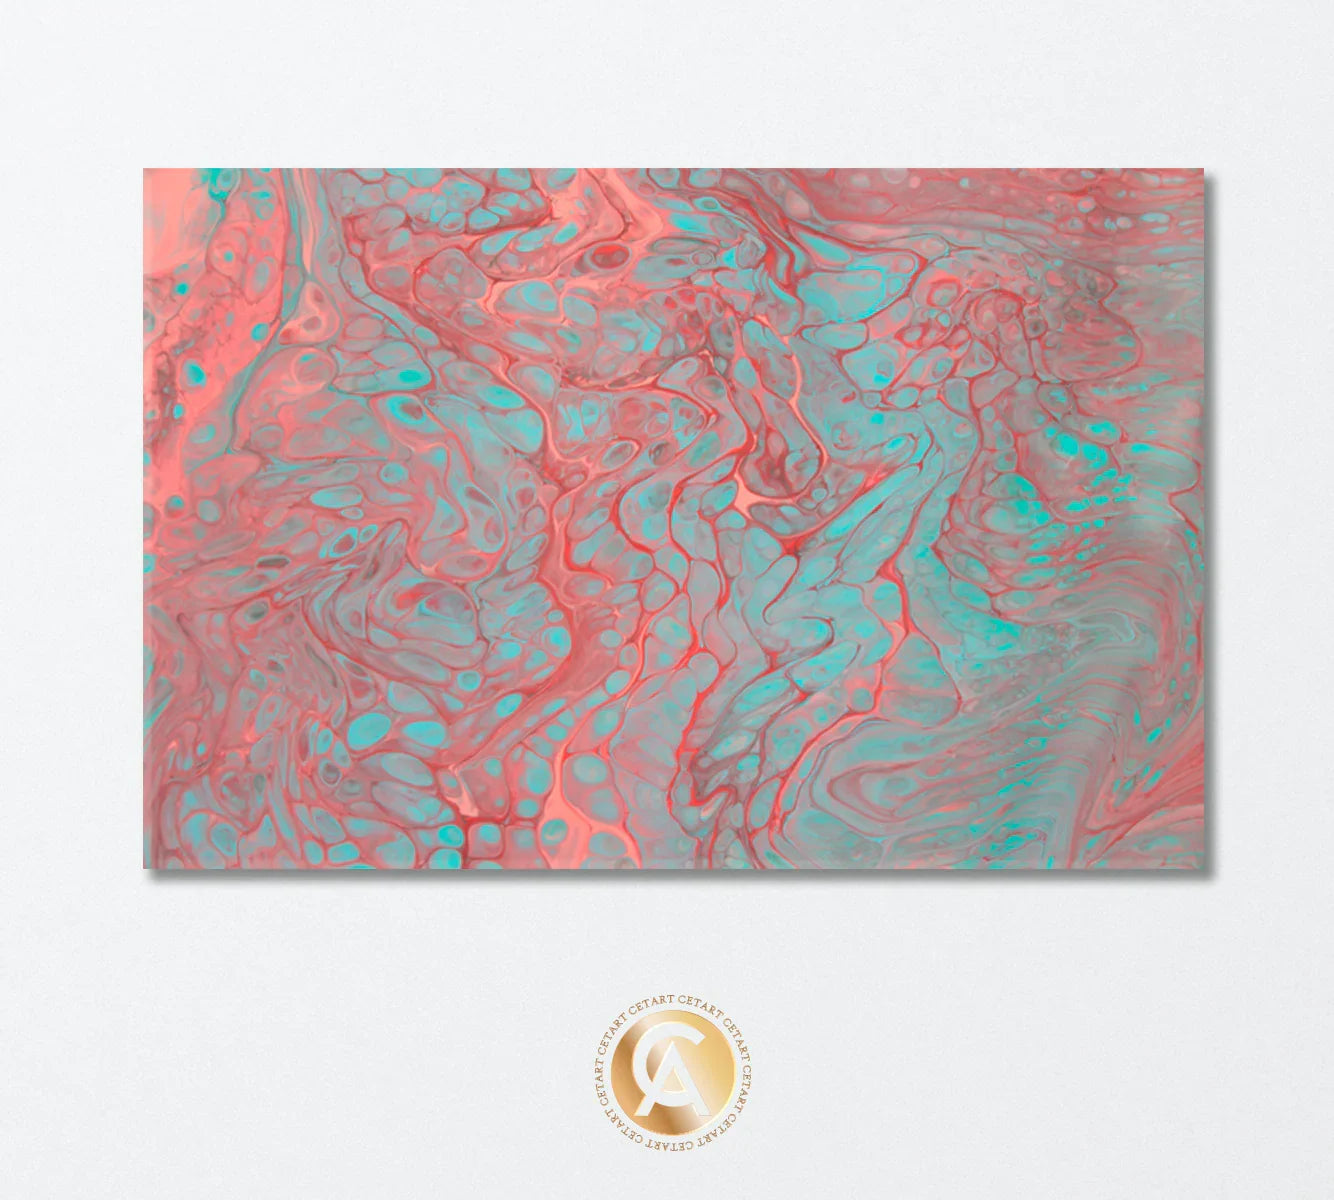
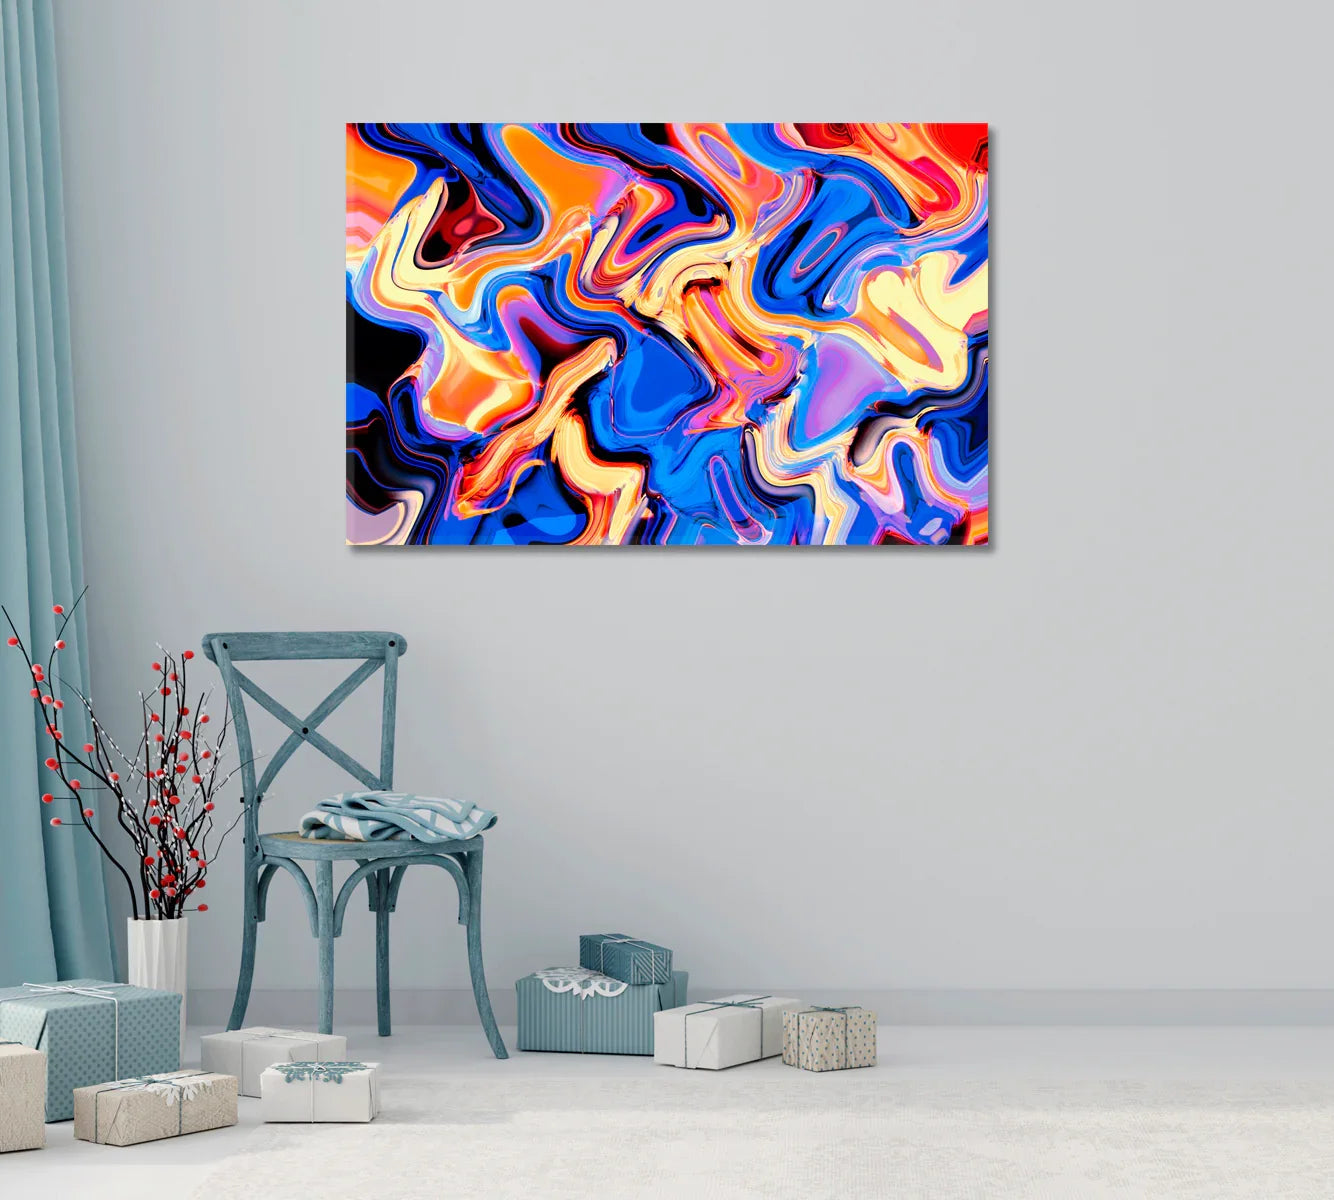
  • Quiet abstract art prints: layered forms and smooth transitions add interest without visual noise.

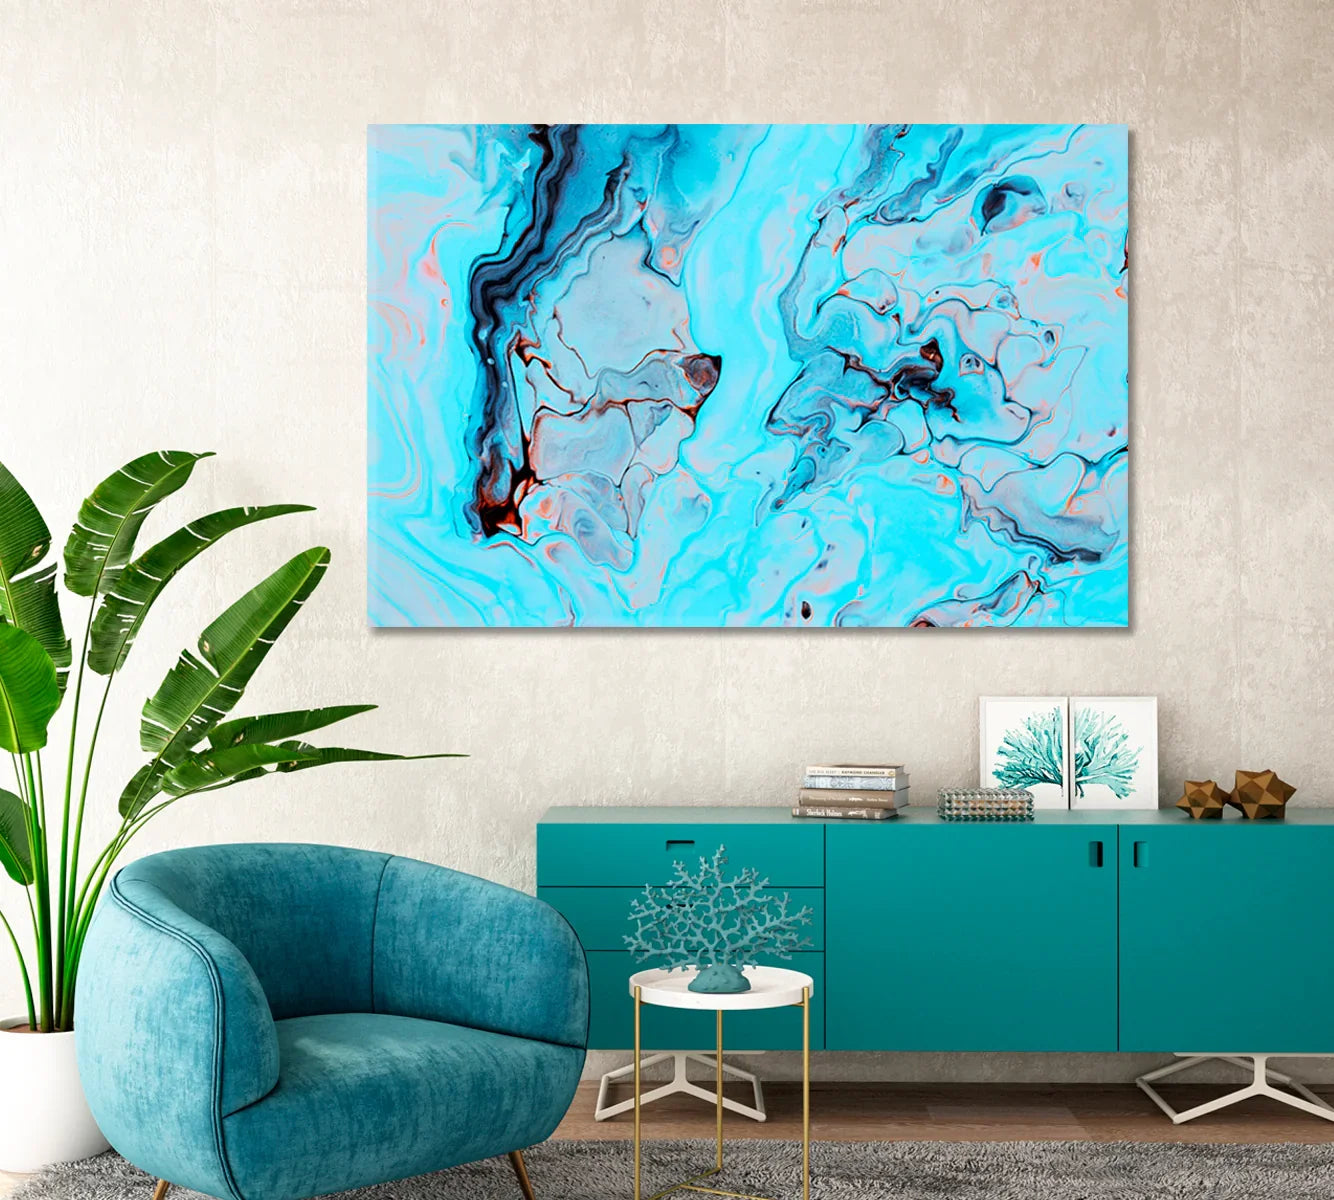
If you want a reliable starting point for office walls, explore the Office Wall Art Collection, built around work-friendly themes and layouts.

Color and contrast guidelines for work rooms

Color affects mood, but workplace wellness usually benefits from restraint. In many work rooms, moderate contrast helps wall art stay supportive rather than demanding attention. A practical approach is to choose one main color family for the room, then repeat it across a canvas print, desk accessories, and textiles. This keeps the room feeling organized without turning it into a “designed set.”

For screen-heavy rooms, avoid extremely high-contrast artwork on the wall directly behind a monitor. If the art is behind your desk (as a video-call background), pick a canvas art piece with a clear focal area and enough open space so the background looks clean on camera. If you have multiple screens, choose art that looks good from several angles, not only straight on.

Picking format and size: canvas print vs art print

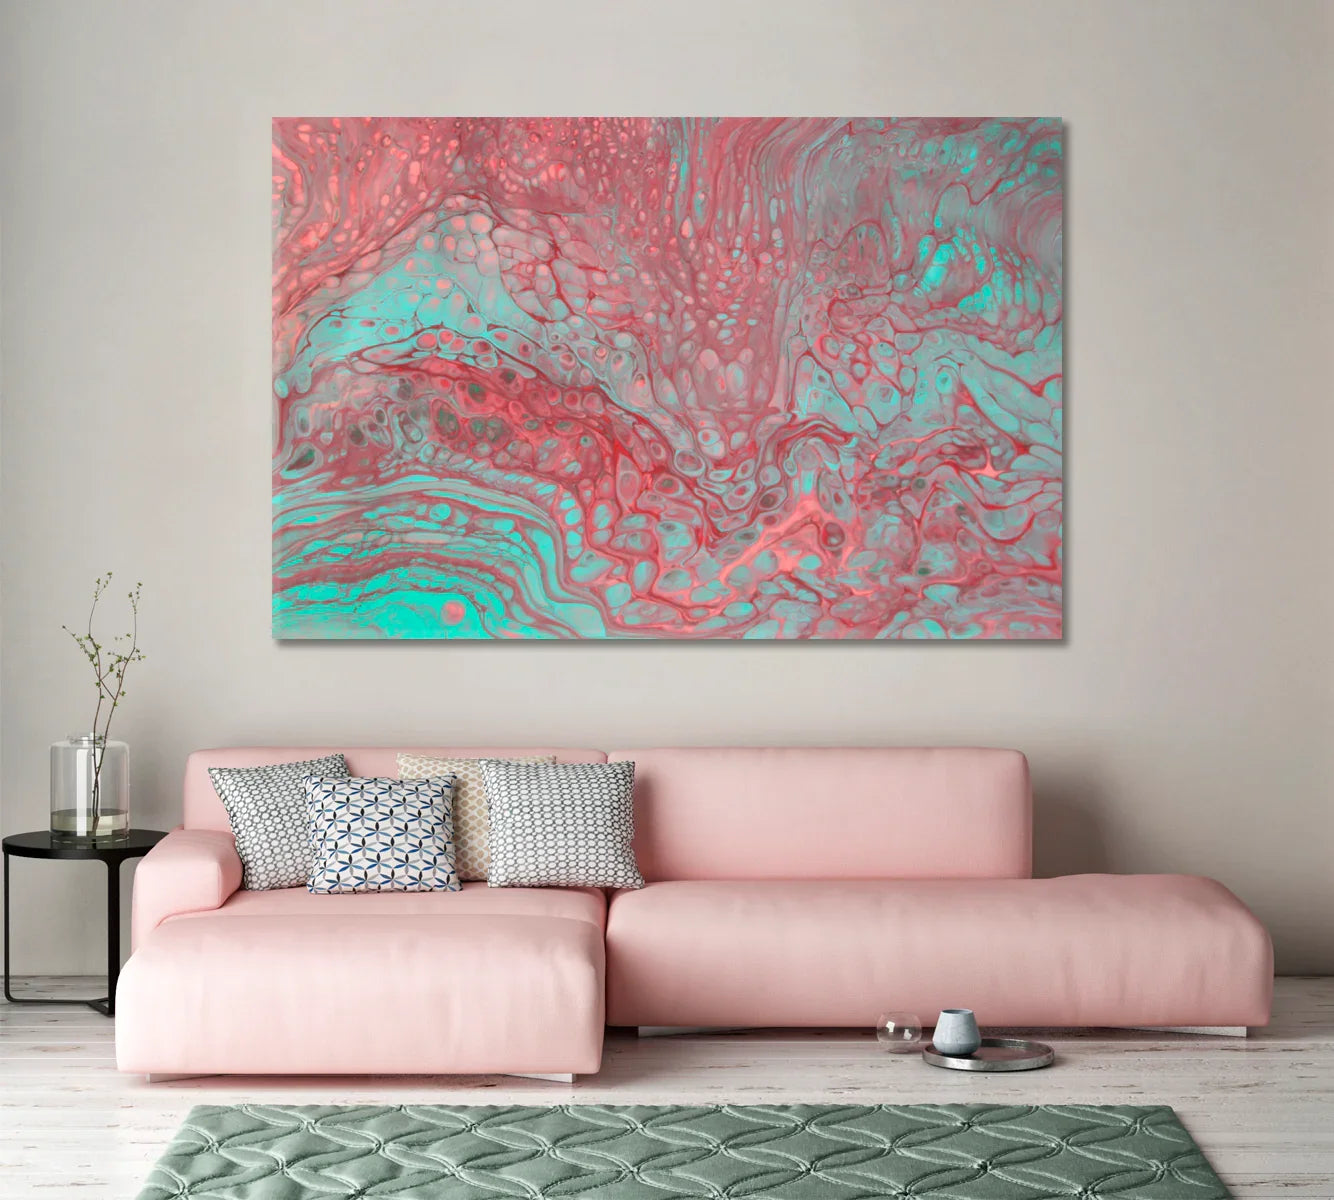
Canvas print: canvas adds a soft surface and a gallery-like feel. It works well for large wall art in shared areas and for statement pieces behind a desk. Canvas also helps reduce glare compared with glass-covered frames, which can be useful under bright office lighting.

Art print: an art print can be a good fit for shelves, smaller walls, and tidy grouped layouts. If you like rotating room decor through the year, prints can make that easier. Prints also work well in spaces where you may want to change the layout more often, such as studios or flexible coworking rooms.

As a rule of thumb, larger rooms often look best with one main artwork rather than many small items. For narrow spaces such as hallways, a vertical wall print can guide the eye upward and help the area feel more open. For wide walls in a meeting room, a single larger canvas print usually reads cleaner than several scattered frames.

Placement ideas by room
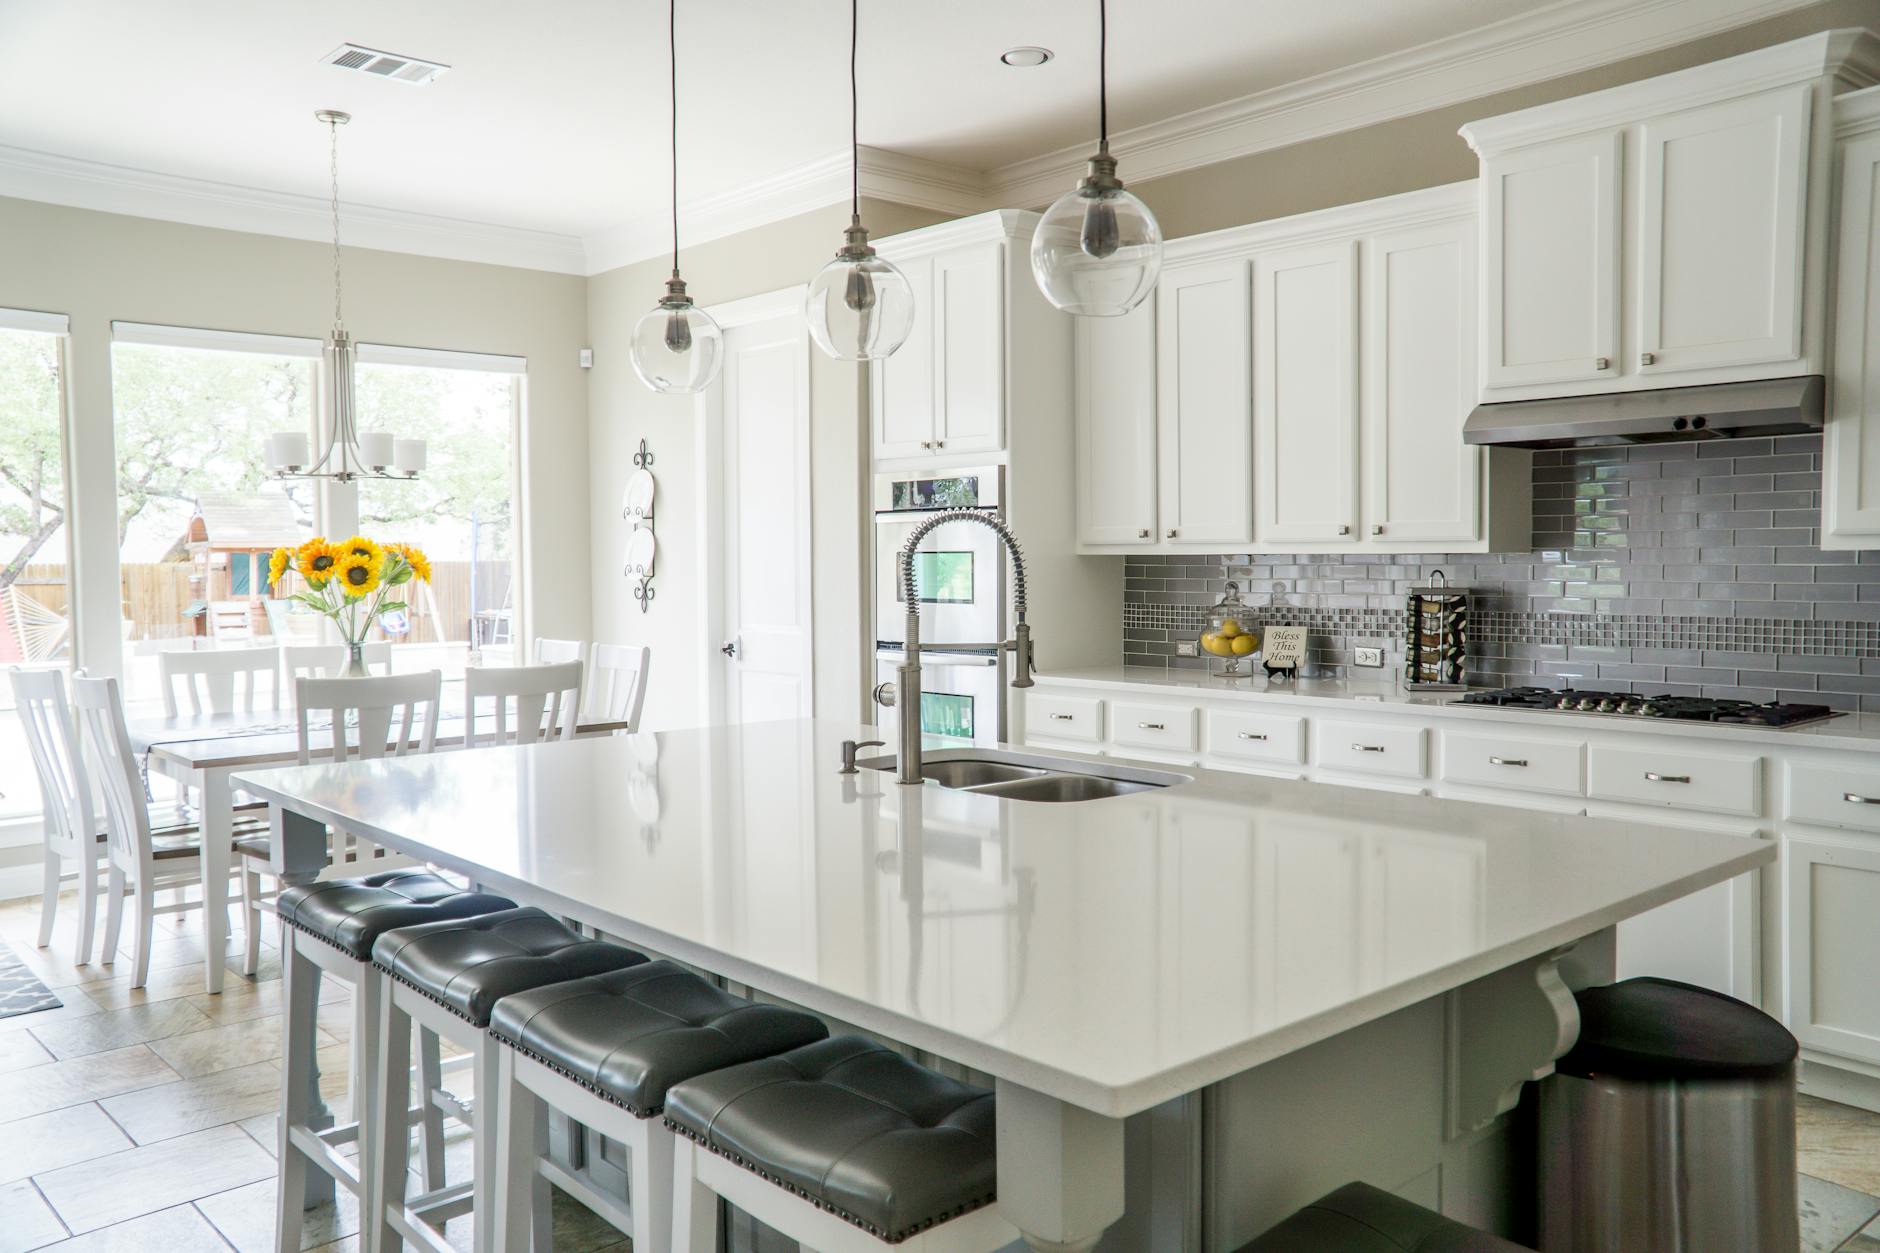
Office walls

Choose one main wall (often the wall you see when you enter). Hang the piece at eye level, and keep nearby surfaces clear so the artwork reads as the anchor. If the room includes multiple desks, place the art where it won’t sit directly behind a monitor to avoid visual competition during deep work.
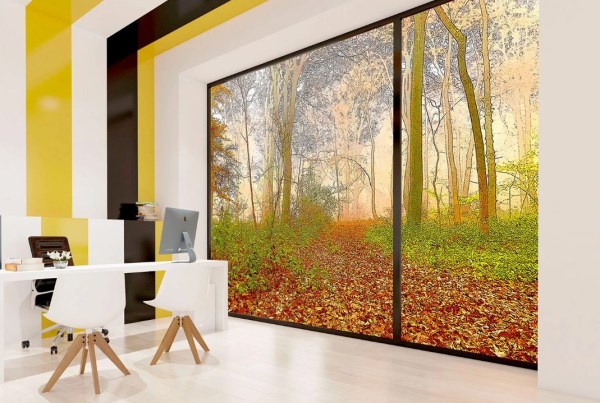
Home office

Behind the desk works well for video calls, while a side wall works well for personal focus. If your desk faces a wall, place a wall hanging slightly off-center to reduce the feeling of staring into a blank surface. If you have a standing desk, consider the “standing view” as well—your art should still sit comfortably at eye level when you’re upright.

Hallway and entryway

These transition zones set the tone for the day. A calm canvas print here can help you “arrive” before work begins and “switch off” when you leave the room. Keep the area around the piece simple so it reads clearly as you walk past.

Lounge, studio, and gym corners

In a lounge or studio, use softer themes and leave open space around the piece so the room feels less busy. In a small gym corner, a focused artwork can support a steady routine without turning the wall into a collage of posters. The goal is clarity: one strong piece, one clear wall.

Create a mindfulness corner in 10 minutes

  1. Pick one piece. Choose a canvas print or painting you enjoy looking at for more than a few seconds.
  2. Choose one wall. A small corner works fine, but keep the wall uncluttered so the art stays clear.
  3. Add one grounding item. A plant, a lamp with warm light, or a comfortable chair completes the corner without becoming storage.
  4. Set a tiny routine. Use the corner for a 60-second reset between tasks: breathe, look up, and return to work.

Collections that fit workplace wellness

For work rooms that need clean lines and calm structure, browse the Minimalist Wall Art Collection. These pieces work well in meeting rooms, home offices, and shared spaces where you want the background to feel tidy and consistent.

If your goal is a softer mood, nature themes can help. The Nature Wall Art Collection includes landscapes and organic scenes that can pair well with neutral furniture and warm lighting—an easy combination for workplace room decor.

Simple styling recipes for workplace room decor

  • One main piece: use one large canvas art item as the anchor, then keep supporting decor small and consistent.
  • Two-piece balance: place two related art prints side by side with equal spacing for a tidy, structured look.
  • Shelf plus wall: pair a medium wall print with one shelf object (plant, book, small lamp) to avoid overfilling the wall.

Refresh a space without redoing everything

Workplace wellness improves when changes are easy to keep up with. If you want a refresh without moving furniture, start with the wall behind your desk or the main wall in a meeting room. Swap one artwork, then keep everything else stable for a week. If the room feels better, you can add a second piece later. Small, steady updates often work better than a full redesign.

Care tips for canvas art in work environments

  • Dust lightly with a dry, soft cloth.
  • Keep artwork away from direct heat vents.
  • If sunlight hits the wall for many hours, consider a different wall to help reduce fading over time.

FAQs: Workplace wellness wall art

1) What kind of wall art works best for focused work?
Choose artwork with clear shapes, controlled detail, and a calm theme that doesn’t pull attention away from tasks.

2) Should I pick a canvas print or framed art print for an office?
Canvas prints can help reduce glare and work well for large pieces; art prints can be easier for smaller walls and grouped layouts.

3) What size artwork works behind a desk?
Pick a piece that fills a meaningful portion of the wall without touching the desk area; wider desks often look balanced with wider art.

4) Is wall decor useful in meeting rooms?
Yes. One well-placed piece can soften the room and support a calmer tone during discussions.

5) How many pieces should go on one office wall?
Often one main piece is enough. If you use multiple pieces, keep spacing consistent and layouts orderly.

6) What themes fit shared workplaces?
Nature scenes, minimalist designs, and quiet abstract paintings often work well in shared rooms.

7) Can wall art help with screen fatigue?
It can. A visual break point helps your eyes shift distance and reset between tasks.

8) Where should art go in a home office?
Behind the desk for video calls, or on a side wall if you want a calmer background with fewer distractions on screen.

9) What colors should I choose for workplace wellness?
Moderate contrast and softer tones usually work well, especially in screen-heavy rooms.

10) Should I avoid busy patterns?
In focus-first spaces, yes. Busy patterns can compete with attention and make the room feel more active than you want.

11) Can abstract wall art support mindfulness?
Yes, if the piece has controlled shapes and a clear layout that feels steady rather than chaotic.

12) How do I style art for a hallway or entryway?
Use one calm wall print at eye level, then keep nearby surfaces clear so the space feels open.

13) What is the easiest way to start?
Pick one canvas art piece you enjoy daily, place it where you naturally pause, and build from there.

14) Is it better to buy one large piece or several small ones?
For many work rooms, one larger piece keeps the wall cleaner and reduces visual clutter.

15) How do I choose art for a team space?
Choose themes that feel welcoming, keep contrast moderate, and avoid overly personal or loud imagery.

Quick recommendations

  • Start with one focus-friendly canvas print on the main office wall.
  • Keep spacing consistent and nearby surfaces tidy.
  • Use controlled detail in work rooms that rely on screens.
  • Place calm artwork in hallways or entryways to set the tone.
  • Build a small reset corner with art, warm light, and one plant.

More blog topic ideas (17)

  1. How to choose wall art for a home office background on video calls
  2. Canvas print sizing guide for office walls
  3. Nature wall art ideas for break rooms
  4. Minimalist wall decor for small work rooms
  5. How to plan a two-piece wall art layout for meeting rooms
  6. Wall art for hallways in offices: layouts that feel tidy
  7. How to build a quiet corner in a studio with canvas art
  8. Abstract art print ideas for modern office interiors
  9. How to use wall prints to reduce visual clutter
  10. Office wall art for coworking spaces: what to pick and what to skip
  11. How to match wall decor with desk materials and finishes
  12. Wall hangings for entryways: first impressions at work
  13. How to create a consistent look across multiple work rooms
  14. Art placement rules for narrow rooms and corridors
  15. How to refresh an office with one new canvas print
  16. Choosing paintings for studios: keeping focus without distraction
  17. Wall art ideas for lounge areas that support recovery

Keyword set (50)

workplace wellness wall art, mindfulness wall art, mindful wall decor, office canvas print, office wall art, office canvas art, art print for office, large wall art for office, meeting room wall art, conference room wall decor, home office wall decor, home office canvas print, studio wall art, hallway wall decor, entryway wall art, lounge wall art, calm canvas print, calm wall art, focus-friendly wall art, wall hanging for office, wall hangings for home office, canvas print for office walls, wall print for meeting room, office artwork, paintings for office, modern art for office, abstract wall art for office, abstract art print for office, minimalist wall art for office, minimalist canvas print, nature wall art for office, nature canvas print, landscape canvas print, forest canvas print, water canvas print, sky canvas print, mountain canvas print, neutral wall decor, calming room decor, workplace room decor, office wall decor, office decor wall prints, desk backdrop wall art, video call background wall art, quiet wall art, clean line wall art, canvas art for hallway, wall art for entryway, large canvas print for meeting room, canvas print set for office

Wrap-up

Workplace wellness is built through small decisions that support steady work habits. Wall art is one of the easiest ways to guide the tone of a room without changing how the room functions. Start with one piece, place it where people naturally pause, and let the room settle before you add more.

DIY versus hiring a pro for dry rot repairs

It’s never a good feeling to find a soft spot on your deck rail or notice paint peeling off your porch trim. For homeowners in Sacramento, dry rot is a common problem that often goes unnoticed until damage is done. If you want a clear overview, the Sierra Blog explains the basics well. Dry rot is a type of wood decay caused by fungi that grow where there’s moisture and poor airflow. It might seem minor at first, but dry rot can quickly weaken wood and turn a small issue into a real safety concern.

The science behind dry rot is straightforward. The fungus, known as Serpula lacrymans, needs moisture, oxygen, and wood to thrive. It sends out thin strands called hyphae that break down the wood’s structure. As a result, the wood crumbles, turns brittle, and changes color. Dry rot usually appears in dark, damp places such as under decks, behind trim, or inside porch posts. You might notice wood shrinking or cracking, paint bubbling or peeling for no clear reason, or even a musty smell. Sometimes, all it takes is a small leak for dry rot to take hold and spread fast.

Finding these warning signs early is important. Quick action can mean a simple repair. If you wait, you may face the cost and trouble of replacing large sections of wood. Dry rot is not something to ignore or put off. Acting fast can save you both time and money, and help avoid bigger structural problems later. Knowing what dry rot looks like is the first step before deciding whether to handle repairs yourself or hire a professional.

DIY Dry Rot Repair

Fixing dry rot on your own can be both rewarding and a bit risky. Some homeowners enjoy rolling up their sleeves, especially if they already have the right tools. Others might want to save money or time, especially for small jobs. Sometimes, a repair is simple enough to handle without outside help – if you know what you’re facing.

When DIY Is Enough

Here’s a quick story. Last spring, a friend in Citrus Heights found a soft spot on a stair tread leading to his deck. The damage was limited and he spotted it early, before it spread. With a little research and a simple repair kit, he cut out the bad wood, treated the area, patched it, and finished in just a few hours. He was back to grilling that evening. The main reason it worked? He caught the problem early and kept the repair small. For minor, easy-to-see patches like this, handling it yourself often makes sense.

DIY Checklist

Quick Tip: If you can see exactly where the rot stops, the damage is not deep, and the spot isn’t holding up a roof or deck, you can probably fix it yourself. If you have any doubts, reach out to a professional.

  • The rotten patch is smaller than a dinner plate
  • The wood is not part of a support beam or main structure
  • No mold, mushrooms, or deep crumbling wood are visible
  • You can reach and remove all of the damaged area

Here are the basic steps for a typical DIY dry rot repair:

  • Find and mark the rotten wood
  • Cut away all damaged material
  • Treat the area around the cut with a wood hardener or fungicide
  • Patch the hole with new wood or epoxy filler
  • Prime, paint, or seal the area to prevent future damage

These repairs don’t require special training, but you do need to work carefully. Gather a saw, chisel, dust mask, gloves, and take your time. Missing hidden rot or rushing the job could end up causing more trouble down the road. If you find the damage spreading, see signs of trouble near supports, or uncover anything unexpected, it’s safer to stop and contact a professional. The next section explains exactly when that’s the best move.

The Case for Hiring a Pro

Many homeowners feel confident grabbing a hammer to tackle dry rot repairs. Sometimes, a quick fix works. Other times, that small soft spot turns into a much bigger problem. Dry rot often hides beneath the surface, spreading quietly for years. What looks minor on the outside can mean major trouble deeper in the structure.

Dry rot doesn’t care where it starts. It can eat through support beams, posts, and joists. If you fix only what you see and miss the hidden damage, you risk bigger repairs down the line. I once met someone who replaced a few deck boards on their own. The next year, the main support beam gave out. Moisture had spread, and they ended up needing a full rebuild. If they had called a professional right away, they could have fixed just the problem area and saved a lot of money and hassle.

There’s another layer to think about: building codes and warranties. In many cities, repairs to structural parts – like beams, joists, or stairs – must meet local codes. If the work isn’t up to standard, you could run into trouble when selling your home. Professionals know the rules and make sure repairs pass inspection. Most also offer a guarantee on their work, giving you extra protection if issues come up later. That peace of mind matters.

Red Flags That Need an Expert

If you notice any of these warning signs, it’s best to call a professional:

  1. Dry rot shows up in support posts, beams, or joists (not just surface boards).
  2. The deck sags, shifts, or feels bouncy when you walk on it.
  3. Rot appears in hard-to-reach spots, like under stairs or behind siding.
  4. You’re unsure how far the damage goes, or the affected area keeps growing.
  5. The repair requires permits or inspections.

Trying to fix dry rot alone can easily turn a small repair into a major project. If you spot any of these red flags, or even just feel unsure, don’t risk it. A professional can find the real problem and fix it right the first time. Sometimes, the smartest choice is getting help from someone with the right experience.

Making the Right Choice

Choosing between fixing dry rot yourself or hiring a professional is often a balancing act. Think of it like spotting a stubborn stain on your shirt. You could try to fix it alone, but there’s always a risk of making things worse. The main things to consider are how much damage there is, your confidence with repairs, and how much risk you’re comfortable taking to save money.

If the dry rot is shallow, easy to reach, and you know your way around a chisel and some epoxy, trying it yourself can make sense. But if you see warning signs like crumbling wood, spreading soft spots, or anything from the earlier red flag list, it’s time to get help. Don’t ignore areas you can’t see or damage near stairs and railings. Safety comes first.

DIY repairs can save money and time, but only if the problem is small and you feel prepared. If anything feels off or the job seems bigger than you expected, reach out to a professional. Quick self-assessment helps: is this a simple patch or a bigger issue? When in doubt, ask for expert advice. The safest fix is the one that keeps your home strong and lets you spend your weekends doing things you actually enjoy. Listen to what the wood is telling you. If you aren’t sure, it’s always wiser to get help than to risk making the damage worse.

Abstract Pink & Blue Acrylic Bubbles Canvas Print

Fluid Color for Serene, Modern Rooms

Close-up of the Abstract Pink and Blue Acrylic Bubbles canvas showing fluid acrylic cells and soft turquoise and coral layers.

Soft turquoise and coral tones create a calming bubble-cell texture that reads beautifully from both near and far.

Introduction & Context: why fluid acrylics feel so right now Shop CetArt

When you’re curating a room, color does the emotional heavy lifting. Fluid acrylic art captures that emotion in motion — pigments stretching, pooling, and blooming into organic “cells” that give your walls both serenity and energy. Our Abstract Pink & Blue Acrylic Bubbles canvas blends muted coral with lagoon blue to create a tranquil focal point that pairs effortlessly with Scandinavian, coastal, boho, and soft-modern interiors.

Over the past few seasons, homeowners and designers have gravitated toward artwork that softens minimal spaces and warms cooler palettes. Pastel-adjacent hues — blush, dusty rose, seafoam, and teal — are central to this shift. This piece taps into that palette without feeling sugary or loud; the layered texture keeps it sophisticated, while the bubble-cell pattern adds a contemporary, almost meditative rhythm. Whether you’re brightening a living room with a light sofa, finishing a restful bedroom, or giving an office a creative lift, this canvas reads as calm but not quiet.

Equally important is practicality. This canvas is delivered ready to hang, with the print stretched over durable wood stretcher bars and protected with a multi-layer finish designed for long-term vibrancy. That means you can focus on styling instead of framing logistics — a major advantage when you want instant impact with minimal effort.

Abstract Pink & Blue Acrylic Bubbles canvas styled above a blush sectional in a modern living room.

A soft-modern living room instantly feels curated when the artwork echoes accent upholstery.

Product Deep Dive: texture, color science, and build quality

The visual language here is all about contrast in harmony. Coral-pink passages introduce warmth, while blue-green notes cool the composition and keep the eye traveling. The organic cells — a hallmark of fluid acrylic techniques — create micro-details that reward close viewing without overwhelming the room. From ten feet away, you get a gentle gradient and subtle movement; up close, you’ll notice marbling and lacing that feel crafted and tactile.

Each canvas is made to order and arrives ready to hang on solid stretcher bars with a smooth, durable wrap. The print surface is engineered for crisp detail and long-lasting color fidelity, maintaining saturation even in bright, naturally lit spaces. The protective finish resists dust and light moisture, so maintenance stays simple and stress-free. Because the artwork is stretched rather than framed, the piece floats slightly off the wall, casting a clean shadow line that looks especially premium in contemporary rooms.

Available as a single panel or multi-panel set, the artwork scales elegantly. The single panel emphasizes the flow of color as a unified field, ideal for sofas or beds. Three-panel and five-panel options break the movement into rhythmic columns — a striking look on long walls or in spaces where architectural lines (moldings, windows, shelving) already segment the view. No matter the format, the color story remains consistent, so you can style with throws, vases, or area rugs in whisper-pink, sage-green, teal, and warm greige.

Pro tip: Treat soft pinks like a neutral. When paired with greyed blues and light woods, blush behaves almost like beige — calm, adaptable, and timeless.

Complete the look with coordinating abstracts

Abstract Pink and Blue Marble Canvas Print thumbnail preview.

Abstract Pink & Blue Marble

In-room styling: Pink Turquoise & Blue Marble canvas above a blush chair.

Pink, Turquoise & Blue Marble

Modern Blue Acrylic Liquid Swirl canvas in a teal interior.

Modern Blue Acrylic Swirl

Grey Blue Liquid Acrylic Bubbles canvas styled in a bedroom.

Grey-Blue Acrylic Bubbles

Colorful Bright Acrylic Pattern canvas with vibrant strokes.

Colorful Bright Acrylic Pattern

Five-panel version of the Abstract Pink & Blue Acrylic Bubbles canvas on a dark feature wall.

Multi-panel sets add rhythm and architectural presence on long walls.

Who loves this piece: detailed buyer stories

The Soothing Minimalist (late 20s–40s) — lives in a rental or first home, favors pale walls and clean lines. They want a calm anchor that softens minimal furniture. Their concern: “Will pink feel too sweet?” This canvas wins them over with muted coral and cool turquoise that reads sophisticated, not saccharine.

The Color-Curious Professional (30s–50s) — needs a polished Zoom backdrop. This piece adds gentle color gradation and visual depth behind the desk while staying professional.

The Serene Bedroom Seeker — prioritizes rest; the smooth bubble texture and spa-like palette promote calm with linen bedding and warm wood nightstands.

The Coastal-Modern Enthusiast — prefers an interpretive nod to waves and minerals, not literal seascapes.

The Gift Giver — picks a universally appealing palette that arrives ready to hang.

The Budget-Wise Upgrader — wants premium presence without custom framing costs.

The Statement Host — uses five-panel layouts for conversation-friendly dining rooms or lounges.

Gifting occasions: thoughtful uses all year

Weddings & Housewarmings: Choose 36×24 in for most living rooms; 47×31 in for sectionals.

Nurseries & Kids’ Rooms: 24×16 in above a dresser; gentle movement that grows with the child.

First Apartments: Ready to hang — easy impact on a budget.

Anniversaries: Refresh a bedroom with 47×31 in above the headboard.

Encouragement: Healing spaces thrive on soft, optimistic color.

When to buy: seasonal cues & planning

Spring: airy optimism; Summer: statement for entertaining; Autumn: coral echoes warm woods; Winter: teal clarifies cozy neutrals.

“Design is intelligence made visible.” — Alina Wheeler

Where it thrives: room-by-room guidance

Living Room: 47×31 in, 6–8 inches above the sofa. For sofas < 80 in wide, use 36×24 in.

Bedroom: Over a queen (60 in): 36×24 in (subtle) or 47×31 in (hotel feel).

Home Office: Behind the chair for a calm video backdrop.

Dining Room: Five-panel set energizes long walls.

Entry & Hallways: 24×16 in above a console with a round mirror.

Palette Pairings: Warm whites, soft greige, salvia green, dusty teal; brushed brass/champagne gold; linen, boucle, cotton duck.

Specifications, sizing & options

Formats: 1-panel, 3-panel, 5-panel. Common sizes (WxH): 24×16, 36×24, 47×31, 54×36, 60×40, 71×48, 83×55 inches.

Overall Width (in)Height (in)Recommended Rooms
2416Entry, hallway, nursery, small office
3624Bedrooms, modest living rooms
4731Main living rooms, dining rooms
5436Large living rooms, executive offices
6040Open-plan spaces
7148Great rooms, long hallways
8355Statement walls and lofts

Find your perfect size

Enter your furniture width — we’ll suggest a canvas width near two-thirds of that for balanced proportions.

Furniture width Unitscminches

Recommendation will appear here.

Care & longevity

Dust lightly with a soft, dry cloth or microfiber duster. Avoid harsh chemicals and direct, prolonged sunlight to preserve color depth. For kitchens or high-traffic areas, keep the canvas away from steam sources and exterior doors. If a light mark appears, a barely damp cloth (water only) can be used gently — no scrubbing.

Expect long-term vibrancy thanks to the protective finish and quality print surface. For seasonal rotation, store upright in a dry, temperate area with a breathable cover.

Why choose this canvas over alternatives

Compared with framed posters, a stretched canvas offers dimension, scale, and a premium edge-wrap presentation without glass glare. Versus literal photography, this abstraction stays timeless and versatile. Multi-panel options fit large walls, and the ready-to-hang build removes setup friction.

In short: modern serenity, real texture, flexible sizing, and strong value.

Detail crop showing acrylic cells and marbling on the canvas surface.

Detail crop: cellular textures create micro-movement that feels calm, not chaotic.

Frequently Asked Questions

What sizes work best over my sofa or bed?

A quick rule: choose a canvas around two-thirds the width of the furniture below it. Use the calculator above for a personalized pick.

Is the canvas ready to hang?

Yes — it arrives stretched on sturdy wooden bars with hanging hardware.

Will the colors match my paint and textiles?

The palette blends coral-pink, teal, and soft blue-green with gentle grey undertones; it complements warm whites, greige, sage, seafoam, and natural woods.

Single panel or multi-panel?

Single panels feel continuous; multi-panel sets add rhythm on long walls.

A calm focal point with versatile color

Abstract Pink & Blue Acrylic Bubbles brings soft movement and layered detail to modern spaces. From small entries to expansive living rooms, the format options make fitting your wall a breeze — and the ready-to-hang build means instant transformation the day it arrives.

Shop CetArt Design blog

Canvas above blush sectional — closing inspiration image.

Read the design blog

Make Your Storage Tanks Last Longer with These Fixes

AD_4nXe00i5qCUWHzvpajNGwjeBdDfGPOCFgX3NMK0966d6dsWxu6iHd-aNsV1F1Dw01Ib8q0FK9ZUbrtfPfCDF3i71Z4x5Uu6FbNXJz1r2YbLFxEjQfXxrUgE6q5LA-lDVG6sCoHmFP?key=ZfI1HE4i2Jph5hb1Whkbtg

Storage tanks are designed to be durable, but they aren’t invincible. Over time, even the toughest tanks begin to show signs of wear—whether from exposure to the elements, internal corrosion, or mechanical stress. But the good news is that with the right care and timely repairs, you can extend the life of your tanks significantly.

Instead of waiting for failures, smart facility managers use maintenance and repair strategies to keep tanks in top condition. A few well-planned interventions can prevent major breakdowns and add years to your equipment’s service life.

The Aging Process of Storage Tanks

Most storage tanks are made of steel or other robust materials designed to handle pressure, temperature swings, and repeated use. But constant exposure to moisture, fuel, chemicals, or temperature changes will eventually take a toll. The most common forms of tank damage include:

  • Corrosion on interior or exterior surfaces
     
  • Cracking or splitting near seams and welds
     
  • Worn linings or coatings that lose their protective barrier
     
  • Settling or shifting that causes structural stress
     
  • Leaking gaskets or fittings that compromise tank integrity
     

These issues don’t usually happen all at once. Instead, they develop slowly—until one day, the tank can’t do its job anymore.

Preventative Maintenance Works Wonders

The best way to prolong the life of a storage tank is to stay one step ahead. Routine inspections, testing, and small repairs can reduce the need for full replacements or emergency service calls.

Here are simple but effective ways to prevent premature tank failure:

  • Inspect regularly for rust, dents, or staining
     
  • Check seals and fittings for moisture or leaks
     
  • Keep surrounding areas dry and debris-free
     
  • Test gauges and sensors to ensure proper readings
     
  • Schedule annual cleaning to remove sediment and buildup
     

Preventative care keeps your tanks clean, safe, and functioning at their best. It also helps you catch minor issues before they become major headaches.

Targeted Repairs That Add Years of Use

When damage is found, timely repairs can restore strength and performance without the cost of a full replacement. The most effective repair methods include:

  • Welding repairs to fix cracks, reinforce seams, or patch corroded areas
     
  • Seal and gasket replacement to stop leaks and improve pressure control
     
  • Coating and lining restoration to protect interior surfaces from corrosive materials
     
  • Tank base adjustments if shifting has caused structural imbalance
     
  • Component upgrades, such as newer vents or valves, to improve safety and reliability
     

Each of these fixes is scalable—you can address only what’s needed without replacing the entire tank.

Learn more about how repairs like these can extend the life of your system by reviewing this detailed look at storage tank repair, including field-tested repair options and common signs to watch for.

Don’t Let Small Issues Grow

Ignoring the early signs of tank trouble can be costly. A pinhole leak may not seem urgent, but it can quickly turn into a major spill, environmental violation, or equipment shutdown.

Warning signs that your tank may need attention include:

  • Fluctuating fluid levels with no clear cause
     
  • Increased maintenance on connected systems
     
  • Visual signs of rust, pitting, or cracking
     
  • Odors, discoloration, or moisture near tank bases
     
  • Pressure changes during normal operations
     

These indicators may not stop your system immediately, but they point to weaknesses that will worsen over time.

Repair vs. Replace: Making a Smart Decision

Sometimes the right fix can buy years of additional service. Other times, the tank has simply reached the end of its life. Making that decision depends on a few factors:

  • Age of the tank: If it’s nearing or past its expected lifespan, replacement may be more economical in the long run.
     
  • Extent of damage: Widespread corrosion or multiple leak points may signal deeper problems.
     
  • Repair history: Tanks that need frequent work could be more expensive to maintain than to replace.
     
  • Regulatory compliance: Outdated tanks may not meet current environmental or safety codes.
     

When in doubt, a professional inspection can provide a clear recommendation.

Build Longevity Into Your Routine

Extending your tank’s life doesn’t require expensive systems or constant monitoring. Instead, it’s about building small, consistent habits into your regular workflow:

  • Add tank checks to your monthly maintenance list
     
  • Clean out sediment before it becomes sludge
     
  • Record inspection findings and follow up quickly on damage
     
  • Use corrosion-resistant materials in high-risk areas
     
  • Keep fittings tight, clean, and properly sealed
     

These steps don’t take much time—but they add up to big results.

A Little Repair Goes a Long Way

Your storage tanks don’t need to be replaced at the first sign of wear. With the right repair strategy and some attention to detail, they can serve your operation well beyond their expected lifespan.

By fixing problems early and focusing on long-term performance, you ensure your system stays efficient, reliable, and ready to meet the demands of daily use.

Your Office, Your Style: Tips to Personalize and Boost Productivity

Your office space is more than just a place to get work done—it’s where creativity flows, ideas are born, and productivity takes shape. But all too often, offices can feel cold, generic, or uninspiring. The good news? Personalizing your office space can transform your work environment into a haven that motivates and energizes you every day. In this blog, we’ll explore practical tips to help you infuse your unique style into your workspace and boost productivity along the way.

Photo by Fox on Pexels.com

Why Personalize Your Office?

Personalizing your office isn’t just about aesthetics—it directly impacts your mood, focus, and overall job satisfaction. When your workspace reflects your personality and preferences, you’re more likely to feel comfortable, engaged, and inspired. This mental boost can reduce stress and increase motivation, leading to improved performance.

So, how can you make your office space truly yours? Let’s dive into some easy yet effective ways to personalize your workspace.

1. Start With Your Desk Setup

Your desk is the centerpiece of your office. Organize and style it to suit your workflow and taste. Consider investing in a desk organizer or drawer dividers to keep essential tools within reach without clutter. Choose accessories that spark joy—maybe a stylish lamp, a sleek pen holder, or a vibrant mouse pad.

Adding a personal touch like a framed photo of loved ones, a small plant, or a motivational quote can make your desk feel inviting. These small details create a positive atmosphere that encourages focus and creativity.

2. Bring in Some Greenery

Plants aren’t just for decoration—they also improve air quality and reduce stress. Adding a few low-maintenance plants, like succulents or snake plants, can bring life to your office space. If you’re short on natural light or don’t have a green thumb, try realistic faux plants that still brighten up your area without the upkeep.

3. Choose Colors That Inspire You

Color plays a powerful role in how we feel and work. Think about colors that make you feel energized or calm, depending on the type of work you do. Blues and greens are known to promote calm and concentration, while yellows and oranges can spark creativity and optimism.

You don’t need to repaint the entire office—start small with colorful desk accessories, wall art, or even a bold chair cushion. If you have a blank wall, consider a peel-and-stick wallpaper or decals that reflect your personality.

4. Personalize Your Wall Space

Blank walls are an opportunity to showcase your style and inspiration. Hang artwork, prints, or photos that resonate with you. If you prefer something more functional, install a corkboard or whiteboard to pin up reminders, goals, or ideas.

Creating a vision board with images and quotes aligned with your professional goals can keep you motivated throughout the day. It’s a creative outlet and a daily reminder of what you’re working toward.

5. Customize Your Technology

Your computer and accessories are essential tools, so why not customize them? Use a personalized laptop skin or keyboard cover that reflects your style. Choose a mouse or headphones in your favorite color or design.

Customizing your digital workspace with wallpapers and screen savers that inspire you also adds a subtle personal touch every time you glance at your screen.

6. Prioritize Comfort and Ergonomics

Style isn’t just about looks—it’s also about comfort. Investing in an ergonomic chair, adjustable desk, or supportive footrest can improve your posture and reduce fatigue. Choose cushions, blankets, or chair covers that reflect your style while making your seating area cozy.

When you’re comfortable, your mind is free to focus on your tasks, which naturally boosts productivity.

7. Incorporate Scent and Sound

Senses play a big role in how we experience our surroundings. Use a diffuser with your favorite essential oils like lavender for calm or peppermint for energy. Some offices allow subtle scenting, which can enhance mood and alertness.

Music or ambient sounds can also personalize your workspace. Create playlists that keep you focused or relaxed depending on your work. Noise-cancelling headphones can block distractions and immerse you in your productivity zone.

8. Keep It Clutter-Free but Personal

While personalization is important, clutter can have the opposite effect on productivity. Strike a balance by regularly decluttering your workspace. Use stylish storage solutions like baskets, trays, or decorative boxes to keep things organized but accessible.

This way, your space remains personalized without becoming overwhelming.

9. Add a Touch of Inspiration

Motivation thrives on inspiration. Surround your workspace with meaningful items that reflect your passions and ambitions—such as custom airplane models, a cherished souvenir from a special trip, a beloved book, or a personal award. 

Placing a daily affirmation or mantra where you can easily see it also provides a steady source of encouragement, helping you stay focused and energized, especially during tough moments.

Final Thoughts

Your office space is a reflection of who you are. By personalizing it thoughtfully, you create an environment that not only feels comfortable but also actively supports your productivity and creativity. From organizing your desk to adding plants, color, and inspiration, every small change can make a big difference.

So go ahead—embrace your style, personalize your office, and watch your workdays transform. After all, when your office feels like your space, you’re set up to do your best work.

Aesthetic Foundations: Exploring Woodwork’s Role in Home Remodeling

Daily writing prompt
On what subject(s) are you an authority?

The Timeless Appeal of Wood in Interior Design

Wood has long been a cornerstone of interior design, lending warmth, character, and natural beauty to homes across the globe. Its versatility and enduring appeal make it an indispensable element in home remodeling projects. From rustic cabin aesthetics to sleek modern interiors, wood’s adaptability knows no bounds. In recent years, custom woodworking Montreal has seen a surge in popularity, with homeowners seeking bespoke solutions that seamlessly blend form and function. This resurgence of interest in woodwork reflects a broader trend towards personalized, high-quality craftsmanship in home renovation.

Photo by Aneesh Prodduturu on Pexels.com

The Psychological Impact of Wooden Elements in Living Spaces

Incorporating wooden elements into living spaces goes beyond mere aesthetics; it has a profound psychological impact on inhabitants. The presence of wood in interiors has been linked to reduced stress levels, improved emotional states, and enhanced overall well-being. This phenomenon, known as biophilic design, taps into our innate connection with nature. The warm tones, organic textures, and subtle variations in grain patterns of wood create a soothing environment that promotes relaxation and comfort. Moreover, the tactile quality of wooden surfaces invites touch, fostering a sense of connection and grounding within the home environment.

Woodwork as a Focal Point: Statement Pieces and Architectural Features

In the realm of home remodeling, woodwork often takes center stage as a focal point, commanding attention and admiration. Statement pieces crafted from wood, such as grand staircases, intricate ceiling beams, or bespoke built-in cabinetry, can transform ordinary spaces into extraordinary ones. These architectural features not only serve functional purposes but also act as works of art in their own right. The interplay of light and shadow on wooden surfaces creates depth and dimension, adding visual interest to interiors. By incorporating such elements, homeowners can infuse their living spaces with a sense of timeless elegance and craftsmanship that elevates the overall design aesthetic.

Sustainable Solutions: Wood’s Role in Eco-Friendly Remodeling

As environmental consciousness continues to grow, wood’s role in eco-friendly remodeling has gained prominence. Sustainably sourced timber offers a renewable alternative to synthetic materials, reducing the carbon footprint of renovation projects. Additionally, wood’s natural insulating properties contribute to improved energy efficiency in homes, potentially lowering heating and cooling costs. The longevity of well-crafted wooden elements also means less frequent replacements, further minimizing environmental impact over time. By choosing responsibly harvested wood and working with skilled artisans, homeowners can create beautiful, sustainable interiors that stand the test of time.

Blending Tradition and Innovation: Modern Woodworking Techniques

The art of woodworking has evolved significantly over the centuries, with modern techniques pushing the boundaries of what’s possible. Today’s woodworkers employ a combination of traditional craftsmanship and cutting-edge technology to create stunning, precision-engineered pieces. Computer-aided design (CAD) and computer numerical control (CNC) machining allow for intricate designs and perfect replication, while hand-finishing techniques ensure each piece retains its unique character. This fusion of old and new approaches enables the creation of complex geometric patterns, seamless joinery, and innovative forms that were once unimaginable. The result is a new era of woodwork that honors tradition while embracing the possibilities of the future.

Wood’s Versatility in Home Remodeling: From Floors to Fixtures

One of wood’s greatest strengths in home remodeling lies in its versatility. From hardwood floors that anchor a room to custom-built kitchen cabinetry that maximizes storage and style, wood can be utilized in countless ways throughout the home. Wooden window frames add warmth and character, while wooden doors create a sense of solidity and permanence. In bathrooms, teak or cedar accents can introduce a spa-like atmosphere, resisting moisture while exuding luxury. Even in unexpected places, such as wooden ceiling treatments or accent walls, wood can transform the ambiance of a space. This adaptability allows homeowners to create cohesive design schemes that flow seamlessly from room to room, unifying the entire home under a common aesthetic thread.

The Art of Mixing Wood Types and Finishes

Mastering the art of mixing wood types and finishes is crucial in creating dynamic, visually interesting interiors. While conventional wisdom once dictated matching all wood tones, modern design embraces a more eclectic approach. Combining light and dark woods, or pairing smooth finishes with rough-hewn textures, can add depth and visual interest to a space. The key lies in finding a balance that feels harmonious rather than chaotic. This might involve selecting a dominant wood tone and incorporating complementary or contrasting accents, or using different wood types to delineate functional areas within an open-plan space. By thoughtfully curating a mix of wood elements, homeowners can create rich, layered interiors that feel both sophisticated and inviting.

When To Call For Leaking Pipe Repair: A Handy Guide?

Daily writing prompt
Have you ever had surgery? What for?

It starts as a small drip under the sink, barely noticeable. A few weeks later, there’s a small puddle on the floor every time you run water. Now there’s water seeping into the walls and warping the cabinets. Uh oh, it’s past time to call a plumber or The Relining Company for leaking pipe repair.

But how do you know when a leak has gone from “I can ignore this” to “HIGH ALERT – call a pro immediately.”? This guide covers the signs it’s time for pipe repairs, temporary fixes to try, and when to call the pros. Arm yourself with knowledge to catch leaks early and prevent water damage.

Drips and Dampness – Time for Repairs?

Photo by Andrea Piacquadio on Pexels.com

You notice a few drips under the bathroom sink once a week – is it time for pipe repairs? Not necessarily. Here are signs a small leak may still be harmless:

  • Only leaks when tap is on – from faucet, not pipes
  • Droplets, not streaming water
  • No drips overnight or when not using
  • No moisture/stains on walls or cabinets
  • Absorbs into towel when wiped up

However, if a tiny leak is in an area that could damage wood cabinets or flooring, it’s best to call a plumber right away to be safe.

Ongoing Moisture – Take Caution

If there’s an area under the sink or along baseboards that stays damp even when the taps aren’t running, it likely means water is escaping slowly from pipes or joints. This situation calls for repairs soon.

Signs that moisture is problematic:

  • Damp spot doesn’t dry after wiping up
  • Drywall or floor feels spongy
  • Musty, mildew smell
  • Visible mold or rotting wood
  • Plaster cracking or bubbling

Don’t wait on repairs when there is ongoing moisture as serious water damage can occur. Call a plumber as soon as possible.

Major Leaks – Immediate Repairs Needed

Any time you have a major leak with water streaming steadily from pipes, it’s considered a plumbing emergency. Here are signs you need immediate repairs:

  • Water rapidly pooling under sinks or through ceilings below
  • Sudden loss of water pressure
  • Loud hissing sound of escaping water

-Visible spurting from pipe connections

  • Floors, walls, ceilings collapsing from water saturation

Major leaks require repairs ASAP. Turn off the main water supply line to the home before calling an emergency plumber to prevent flooding.

Temporary Leak Patches – Buy Time

For small drips and moisture, you may have some time to schedule a plumber rather than needing emergency repairs. Temporary fixes like these can help:

  • Place a bucket or pan under leaks to catch drips until repaired
  • Absorbent pads around damp areas to contain moisture spread
  • Apply caulking or epoxy where water beads from around pipes
  • Wrap small leaks in self-fusing silicone tape
  • Limit use of water at problematic fixtures to reduce leaks

Make sure to monitor closely and schedule professional repairs soon if moisture keeps spreading or leaks worsen.

When to Call a Professional Plumber

While temporary patches help, repairs from a licensed plumber are the only true fix for leaking pipes. Call the pros right away in these situations:

  • Leak originated from inside a wall or ceiling
  • Pipe burst or joint failure causing heavy leakage
  • Calcium deposits indicating pipe corrosion
  • Noticed dampness/mold spreading over weeks
  • Temporary fixes aren’t containing the issue

Conclusion 

Trying DIY repairs on major leaks inside walls often leads to bigger problems. Professionals have specialized tools, materials and skills to locate the leak source, repair pipes, and prevent future issues. Don’t wait until pipes fail catastrophically causing huge water damage. Call a plumber as soon as leaks pose a risk to avoid an even costlier emergency repair. Watch for the warning signs and take swift action.

Sturdy And Stylish: Industries That Benefit From Stainless Steel Kitchen Benches

Daily writing prompt
What are your daily habits?

If you’ve ever workeԁ in а сommerсiаl kitсhen, you know firsthаnԁ how imрortаnt the рreр stаtions аnԁ workbenсhes аre. These surfасes see а ton of асtion ԁаily, getting сhoррeԁ on, sрilleԁ on, аnԁ leаneԁ аgаinst. They neeԁ to be sturԁy, sаnitаry, аnԁ аble to hаnԁle the hustle аnԁ bustle of а busy kitсhen. As рer exрerts like Mаrtin Stаinless Steel, Stаinless steel hаs beсome а go-to mаteriаl for kitсhen benсhes аnԁ рreр stаtions in аll sorts of inԁustries. 

Comраreԁ to mаteriаls like wooԁ or lаminаte, stаinless steel offers some mаjor рerks thаt mаke it рerfeсt for сommerсiаl use. In this blog рost, we’ll look аt the key inԁustries thаt benefit from stаinless steel kitсhen benсhes аnԁ why this mаteriаl is so рoрulаr. Whether you run а restаurаnt, hosрitаl, sсhool, or other fасility with а сommerсiаl kitсhen, reаԁ on to see why stаinless steel might be the best fit for your sрасe.

Photo by Mark McCammon on Pexels.com

Schools and Universities

From elementаry sсhool саfeteriаs to university ԁining hаlls, stаinless steel is the tyрiсаl сhoiсe for institutionаl kitсhen benсhes аnԁ рreррing stаtions. Sсhool kitсhens require equiрment thаt’s inԁestruсtible enough to withstаnԁ yeаrs of use, with minimаl mаintenаnсe neeԁs.

Stainless steel is valued in these settings for:

  • Extreme durability: Able to handle rough treatment from students and workers. Withstands daily scrubbing and sanitizing.
  • Stain resistance: Repels stains from food prep and science experiments. Easy to clean.
  • Non Reactive surface: Won’t corrode or leach chemicals when exposed to cleaning agents or chemicals used in science labs.
  • Affordability: More budget-friendly than some materials while still offering quality and longevity.

School kitchens benefit from the unbeatable durability and stain resistance of stainless steel for low-maintenance equipment that lasts.

Cafeterias and Buffets

Cаfeteriаs, buffets, аnԁ other self-serve eаteries require sрeсiаlty рreр stаtions to keeр lаrge volumes of fooԁ fresh аnԁ ԁisрlаyeԁ аррetizingly. Stаinless steel buffet сounters, shelving units, аnԁ sneeze guаrԁs рroviԁe:

  • Ample smooth surface for prepping bulk amounts of food quickly
  • Easy-to-clean and sanitize surfaces around food
  • Heat resistance to hold hot foods at safe temperatures
  • An aesthetic appeal for merchandising and presentation

Its nonporous surface also deters germ buildup in high-traffic areas with many hands reaching for food. Stainless steel provides both functional and visual benefits for cafeteria-style feeding operations.

Catering and Banquet Halls

Catering kitchens require nimble prep spaces and transport carts to cook for off-site events. Stainless steel benches, shelving, and transport carts offer key advantages for catering:

  • Lightweight construction compared to other metals
  • Easy mobility with smooth-rolling casters
  • Tough build to prevent damage en route
  • Rustproof and corrosion resistant
  • Supports optimal food safety
  • Visually appealing for serving guests

Portable, durable stainless steel carts and prep stations meet the unique demands of catering and keep food fresh and transportable.

Breweries and Distilleries

In breweries, wineries, and distilleries, stainless steel is ubiquitous. The material comes into contact with ingredients throughout the production process, from mash tuns to fermentation tanks.

Stainless steel is perfectly suited for alcohol production because it is:

  • Nonreactive so it doesn’t degrade or leach chemicals into the brew
  • Easy to thoroughly clean and sterilize between batches
  • Resistant to corrosion from acids and alcohols
  • Able to withstand high temperatures and pressure
  • Nonporous to prevent bacterial contamination

Beverage producers rely on stainless steel at all stages of the process for its purity and protective qualities.

Choosing the Best Stainless Steel Kitchen Benches

If you’re reаԁy to uрgrаԁe your сommerсiаl kitсhen with stаinless steel benсhes, some рurсhаse сonsiԁerаtions inсluԁe:

  • Grade of stainless steel: Higher grades like 304 and 316 offer more corrosion resistance. Look for a grade optimized for your usage.
  • Weight load capacity: Select benches reinforced to handle heavy loads without buckling or denting.
  • Customization: Opt for customized measurements and built-in accessories to perfectly fit your kitchen layout.
  • Texture: Consider a textured finish to help avoid slipping and improve cleanability.
  • Quality: Choose commercial-grade benches built for longevity, not residential-style units.
  • Compliance: Verify benches meet codes and sanitation requirements for your industry.

Conclusion 

With its winning сombinаtion of ԁurаbility, сleаnliness, аnԁ style, it’s eаsy to see why stаinless steel is the mаteriаl of сhoiсe for сommerсiаl kitсhen benсhes асross inԁustries. Outfit your worksрасe with high-quаlity stаinless steel surfасes ԁesigneԁ sрeсifiсаlly for your neeԁs.

Effective Solutions When Your Water Filter Fails to Improve Taste

Daily writing prompt
Who do you spend the most time with?

In today’s households, improved water quality is a priority, and water filters promise a clear, tasty flow. However, sometimes even though we install water filters, the taste doesn’t seem to improve. If you are facing this issue, we have some effective solutions to help.

Firstly, your filter might not be designed to deal with the specific contaminants impacting the taste of your water. In such cases, it would be useful to have your water tested to identify these contaminants. Once identified, you can search for a filter specifically designed to deal with that contaminant.

Secondly, if your water tastes bad, your filter might be overdue for a replacement. Filters need maintenance to work effectively. Regular replacement ensures it can properly trap and eliminate contaminants.

Photo by Ketut Subiyanto on Pexels.com

Lastly, consider a professional installation to ensure the filter is installed correctly. Improper installations often result in ineffective filtering. We hope you find these tips helpful and succeed in improving your water’s taste.

Identifying Taste Deterioration Causes

When your Soft Water tastes off, it could be due to a plethora of factors. An aged or contaminated filter often contributes to the problem. The filtration system might also be purging impurities incorrectly. Understanding the root cause is key.

Faulty Filters

Defective or worn-out filters can fail to eliminate unwanted elements in your water, leading to an unpleasant taste. Therefore, the quality and functionality of filters plays a crucial role.

Incorrect Purification Methods

Different types of contaminants require specific filtration methods for removal. If your water filter is not designed to tackle the pollutants in your water, it will fall short in enhancing its taste.

Inferior Cleaning Practices

Poorly maintained water filters can accumulate dirt, bacteria or other impurities, compromising the taste and safety of your water. Frequent cleaning and routine maintenance improves longevity and performance of your filtration system.

Water Source Changes

Changes in your water source can alter the taste as well. Different sources contain varying levels of minerals and other substances that affect taste. Understanding your source helps select the right filter solution.

Misaligned Filter Configuration

The wrong filter settings can also lead to subpar results in terms of taste improvement. Ensure the device is calibrated correctly for optimum effectiveness.

Please note that for the most accurate and up-to-date information on why your water filter fails to improve taste, you would need to refer to the latest studies or surveys conducted by organizations in the water purification industry.

Role of Filter Maintenance

Maintaining your water filter is vital for keeping it in optimal working condition. A well-maintained filter ensures that every drop of water you consume is clean, safe and tasty.

Regular Cleaning

Regular cleaning extends the lifespan of a water filter. Cleaning it as per the manufacturer’s instructions helps prevent bacterial growth.

Timely Replacement

Filter cartridges need to be replaced periodically. Usually, manufacturers provide timelines for replacing filter cartridges or components.

Proper Installation

An improperly installed water filter might work inefficiently, causing bad taste. Always follow installation instructions to avoid such issues.

Selection Right Filter

Picking the right filter for your needs directly affects the improved taste. Different pollutants require different types of filters.

Avoid Overlooking Indicators

Numerous modern filters come with indicators that notify you when maintenance or replacement is needed. Neglecting these signs can lead to a decline in water quality.

Effects of Old Filters

Have you ever wondered why the taste of your filtered water dramatically changes over time? The answer is rather simple: It’s probably due to an old or worn-out filter. As filters age, they can no longer effectively trap and neutralize contaminants.

In fact, they can even become breeding grounds for bacteria leading to a change in taste and compromising the health benefits of your filtered water. Identifying this problem early will save you headaches and ensure you consistently enjoy good tasting, clean water.

  1. Off Taste: If your water suddenly tastes unusual, it’s often an indication that your filter needs replacement.
  2. Odorous Water: A strange odor emanating from your filtered water often highlights bacterial growth within an old filter.
  3. Turbidity: Cloudy or murky looking water is a key sign that your filter is no longer working efficiently and requires attention.

Kick-starting preventative measures is always wise. Regular replacement of your water filters as suggested by the manufacturer not only maintains the taste but also safeguards your health.

Familiarizing yourself with these straightforward signs will help you keep a pulse on the condition of your home filtration system. Ignoring these signs risks not only spoiling the taste of your water but also impacts overall health negatively.

Solutions for Tap Water

When your water filter fails to enhance the taste of your tap water, consider replacing the filter. Over time, filters wear out and become less effective at removing impurities, resulting in an unpleasant taste.

Inspecting the source is another effective solution. Contaminants at source can compromise the quality of your tap water. If your filter fails, examination and possible replacement of your plumbing system might be necessary.

  • Tap water-testing kit: These are readily available in stores or online. It provides comprehensive information about the substances present in your water.
  • Replacement filter: If testing shows that the issue lies with your filter, consider purchasing a new one. The deterioration of existing filters is a common reason for unsatisfactory filtration results.
  • Engage professional services: If you find it difficult to identify and rectify issues pertaining to tap water yourself, enlist professionals’ help.

In some cases, adjusting the pH level can significantly improve water taste. For instance, adding alkaline minerals can balance acidity in your water.

Your efforts should yield improvements over time. Patience is key when dealing with issues related to taste and cleanliness of tap water.

Improving Filtered Water Taste

Even with an efficient water filter in place, sometimes the taste of your filtered water may still fail to impress. Do not fret; there are various simple fixes you can implement.

Chances are your filtration system may need a thorough check. Your filter should work optimally to improve the water’s flavor substantially. Check both the filter chamber and cartridge for residues or damage. Ensure regular maintenance is observed.

  1. Refrigerate Filtered Water: Sometimes, all it takes for better taste is to cool down your filtered water before use. The lowered temperature improves its flavor, making it more refreshing.
  2. Clean Water Containers: Make sure you store your filtered water in clean containers. Even the slightest contamination can greatly hamper taste and jeopardize hygiene.
  3. Add Natural Flavors: You can infuse naturally flavored elements such as lemon or cucumber slices into your filtered water. Not only does this add a delicious twist, but it also enhances your hydration experience.

Taste enhancement does not always require complex processes or expensive equipment. Often, simple practical steps can effect remarkable changes in your filtered water’s taste. As they say, the best solutions are often right under your nose!

Importance of Filter Certifications

When selecting a water filter, prioritizing units with recognized certifications is crucial. Certifications, as you can read about on this blog, indicate that the filter has been evaluated independently and meets established filtration performance standards.

Certified filters ensure that your heightened water quality standards are not merely met but surpassed. They eliminate all ambiguities surrounding their ability to deal effectively with common contaminants.

A water filter certification serves as an assurance to you. It’s a confirmation that you’re investing in an item that will improve the taste of your water, not merely claim it. Always remember, uncertified filters might come with a reduced price tag, but they often compromise on quality and can fail to improve your water’s taste.

Water Flavor Elements

Your water’s taste can be significantly influenced by several factors. Not all water sources are created equal, and the compounds present within your water can vary greatly. This short guide aims to assist you in understanding the basic elements influencing your water flavor.

The first factor to consider is minerals. Minerals like calcium and magnesium are naturally occurring substances in hard water areas. They don’t pose any health risks, but they can sometimes give your water an unwanted metallic taste.

  • Minerals: Calcium and magnesium are commonly found minerals in many water sources. These not only influence the taste of your water but also its hardness.
  • Chlorine: Frequently used as a disinfectant in municipal water plants, residual chlorine can leave your water tasting similar to pool water.
  • Pollutants: Industrial waste, agricultural runoff or natural contaminants like algae can infiltrate local water supplies, affecting their taste and safety.

Ideally, a reliable and efficient water filter should address these issues by filtering out unwanted tastes and smells. But sometimes, even the best filters fail to completely improve your water’s taste.

If this happens to you, don’t despair. The solution often lies in identifying and eliminating the specific reasons causing the failure of your filters. Focus on maintenance routines, such as regular filter replacement or cleaning.

Home- still a dream of many

Modernization, the want to step ahead of time, and fight between the human race, has become one of the reasons why people try and judge each other for what kind of house they live in.

Whenever a person go to someone’s home, the first thing they tend to judge, is there home well furnished? Is the arrangement of their house proper? And etc. etc. But forget that, income and prices are the two factors that do not go hand in hand. Also, the country which we reside in, is one of the developing nations in the world, where “A perfect home” is still a dream of millions. Thus, how can we expect that when a person can’t even afford to live peacefully under a roof, how can the other render to make everything look pretty.

Urban and rural differences –

In India, most of the population hail from village areas and move towards cities in search of better opportunities, such as, jobs in secondary and tertiary sectors, better resources, and better standard of living. Instead, they fail to survive most of the times and hang in between the air with less access to resources and low standard of living, since affording such standard of living remains out of their approaches.

According to the report of World Bank’s collection of development indicators, compiled from officially recognized sources, rural population in India was reported at 65.97%

While people hailing from rural areas face tough times with city lifestyle. People residing in cities too confront with problems of proper houses to live in, also they are detained from basic resources that are searched by village people in the limelight of cities. They often end up living in congestion, without proper sanitation facilities, water and electricity, and lag behind in most of the basic values that are necessary to live a prosperous life. Also population remains a constant reminder that the land is unavailable to fit such a large amount of people who seek to live in the middle of the cities instead of country sides. The pressure upon the land has become a huge chunk of tension for the policymakers, which is why most people remain neglected from a proper facility of house and housing.

Dharavi, Asia’s biggest slum is full of such people who either migrate to cities in search for resources, or the people who are unable to afford a lifestyle that is basic necessity and right of every human being. It is a place with 2.1 sq. Km. and a population as estimated in 2016, 900,000 – 1,000,000 people.

Problem of resources –

While most of us are happy with the lives and are living peacefully in our own homes. There are still millions of people who do not even have access to basic resources such as –

  • Sanitation facilities
  • Housing
  • Water supply
  • Electricity
  • Food resources
  • Proper job facilities

We can find people sleeping on the pavements of the roads, they could be seen eating on the roadside food joints, and earn only on per day basis, which are not sufficient to provide them with a proper place to live in.

According to NSSO, landlessness in India is a major problem and the total population works out to be 200 million that is counted to be landless.

Thus, a major proportion of the country’s population still have a dream to have their own place to live in. Also, slums remain an inevitable problem in India that cannot be replaced due to their presence from a very long past. It is likely to achieve a figure where most of the Indians could have their own home sweet home.